
These no-bake beauties transform simple pantry staples into an extraordinary dessert that rivals any store-bought candy bar. The combination of buttery graham cracker layers, crisp club crackers, and a luscious chocolate-peanut butter topping creates a texture symphony that’s absolutely divine. What makes this recipe particularly special is how it captures the essence of those iconic wafer bars while adding depth and richness that elevates the entire experience.
Why Homemade Kit Kat Bars Matter
When it comes to no-bake desserts, few treats offer the satisfaction and nostalgic appeal of homemade candy bars. If you’re passionate about creating impressive desserts without turning on your oven, you’ll want to explore our no-bake chocolate eclair cake and chocolate chip cookie dough bars for more inspiration. For those seeking professional techniques and creative variations, Best No-Bake Desserts From a Test Kitchen Pro offers expert insights, while No-Bake Chocolate Peanut Butter Bars provides complementary flavor combinations that pair beautifully with these homemade treats.
The beauty of homemade candy bars lies in their ability to transport us back to childhood while satisfying our adult palates with superior ingredients and customizable flavors. Unlike mass-produced versions, these Homemade Kit Kat Bars allow you to control every element, from the sweetness level to the quality of chocolate used. The technique originated from resourceful home bakers who wanted to recreate their favorite confections during rationing periods, leading to creative combinations that often surpassed the originals.
This particular recipe has evolved from traditional wafer-making techniques, incorporating the convenience of readily available crackers with homemade caramel-like filling. The result is a treat that maintains the beloved crunch factor while introducing layers of flavor complexity that make each bite more interesting than the last.
Homemade Kit Kat Bars Ingredients
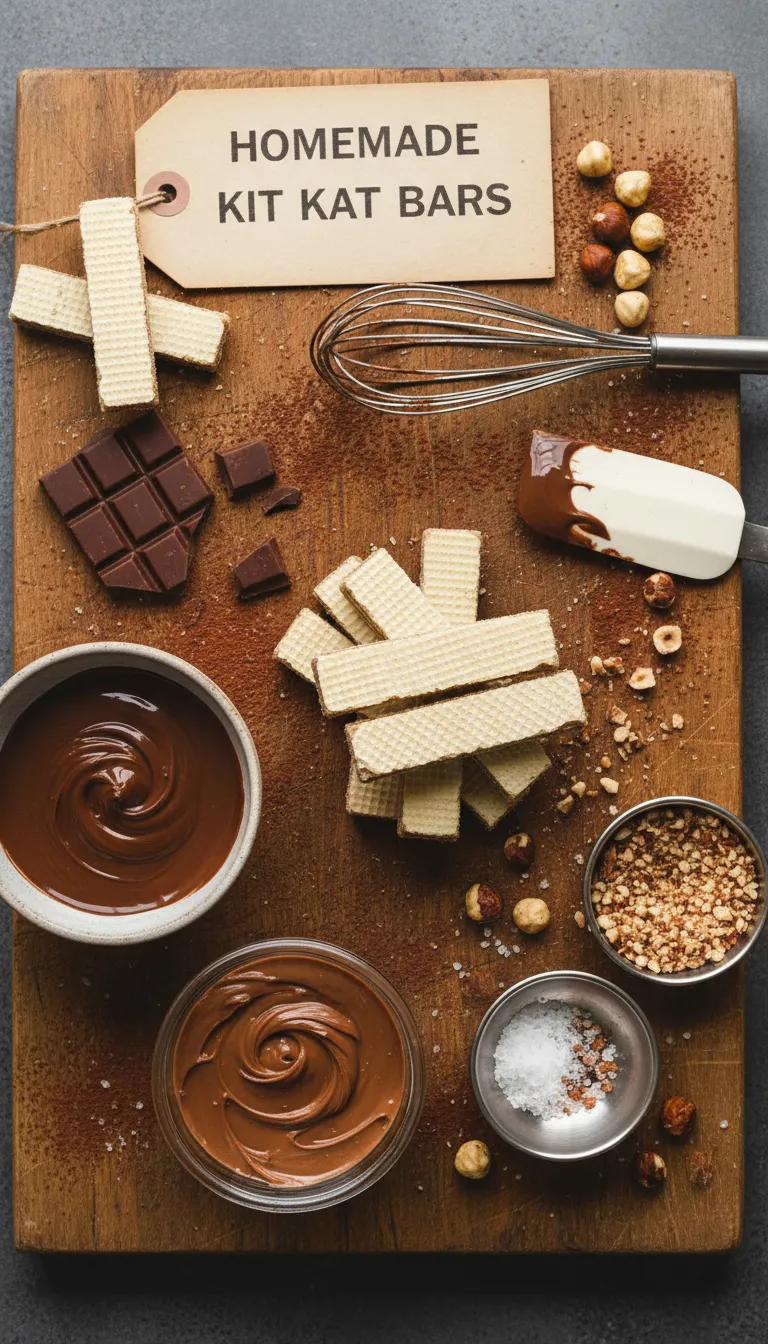
Ingredient Spotlight
Club Crackers (72 pieces): These buttery, crispy crackers form the structural foundation of our bars, providing that essential wafer-like crunch. Their neutral flavor and sturdy texture make them perfect for layering without becoming soggy.
Salted Butter (1 cup): The richness and slight saltiness enhance all other flavors while creating the binding agent for our graham cracker mixture. Using salted butter adds depth and balances the sweetness beautifully.
Light Brown Sugar (1 cup, firmly packed): This creates caramel-like notes and helps bind the filling while adding moisture. The molasses content gives complexity that white sugar simply cannot provide.
Granulated Sugar (⅓ cup): Works alongside brown sugar to achieve the perfect sweetness balance and helps create the ideal texture in our filling mixture.
Graham Cracker Crumbs (2 cups): These add honeyed sweetness and create the signature filling texture that mimics traditional wafer layers while contributing structural integrity.
Milk (½ cup): Provides moisture and helps create a smooth, spreadable consistency in our filling mixture while adding subtle creaminess.
Creamy Peanut Butter (⅔ cup): Elevates these bars beyond traditional Kit Kats by adding protein, richness, and that irresistible nutty flavor that pairs perfectly with chocolate.
Semi-Sweet Chocolate Chips (1 cup): The crowning glory that provides that classic chocolate shell. Semi-sweet offers the perfect balance of sweetness and cocoa intensity.
Essential Substitutions
- Club Crackers: Substitute with saltine crackers or graham crackers for different flavor profiles
- Peanut Butter: Use almond butter, sunflower seed butter, or omit entirely for nut-free versions
- Chocolate Chips: Dark chocolate, white chocolate, or butterscotch chips work beautifully
- Milk: Heavy cream creates richer filling, while plant-based alternatives accommodate dietary restrictions
Perfect Timing for Homemade Kit Kat Bars
One of the most appealing aspects of this recipe is its efficiency. With just 15 minutes of prep time and 5 minutes of cooking time, you can have these bars assembled and ready for chilling in just 20 minutes of active work. Compare this to traditional candy-making methods that can take hours, and you’ll appreciate the 75% time savings this approach offers.
The chilling time of 1-2 hours is passive, allowing you to focus on other tasks while the bars set to perfection. This makes them ideal for last-minute entertaining or when you need an impressive dessert without the stress of complicated baking procedures.
Step-by-Step Instructions for Perfect Homemade Kit Kat Bars
Step 1: Create Your Foundation
Line an ungreased 9×13-inch baking dish with a layer of club crackers, arranging them in a single layer with minimal gaps. This creates your first wafer layer, so take time to arrange them neatly for the best final appearance.
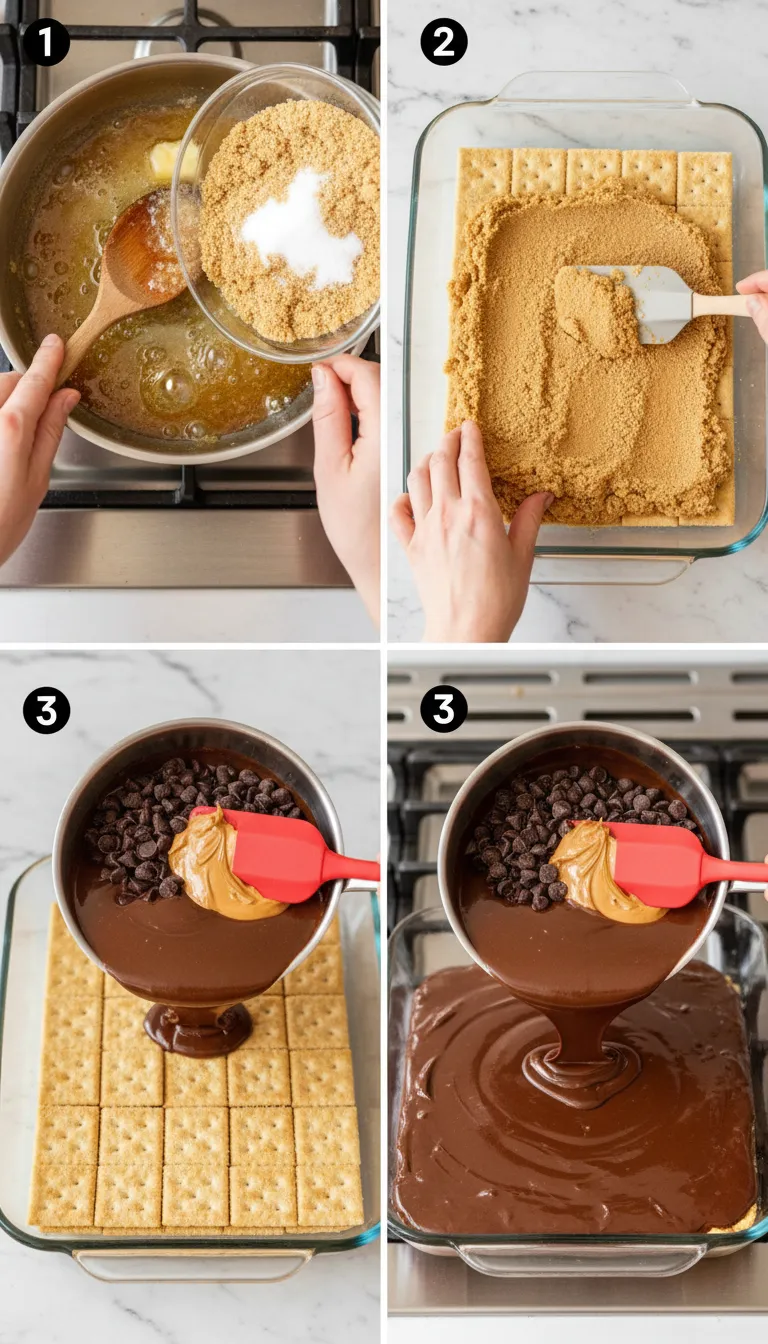
Step 2: Prepare the Magic Filling
In a large saucepan over low to medium heat, melt butter and both sugars gently while stirring constantly. The key here is patience – rushing this step can result in grainy texture. Once melted, stir in graham cracker crumbs and milk, continuing to stir until everything is completely combined and smooth. Never allow this mixture to boil, as it can cause separation and affect the final texture.
Step 3: Build Your Layers
Remove the saucepan from heat and carefully spread half the butter mixture evenly over your cracker layer. Use an offset spatula for the smoothest application. Layer another set of crackers on top, then spread the remaining butter mixture over this second layer. Finish with a final layer of crackers, pressing gently to ensure good adhesion.
Step 4: Create the Chocolate Crown
In a small saucepan, combine peanut butter and chocolate chips. Melt over medium-low heat, stirring constantly until completely smooth and glossy. This chocolate-peanut butter coating should be pourable but not too thin. Spread evenly over the top layer of crackers using smooth, confident strokes.
Step 5: The Patience Game
Cover with plastic wrap and refrigerate for 1-2 hours until the chocolate topping is completely firm. This chilling step is crucial for clean cutting and proper texture development throughout all layers.
Tips & Tricks for Perfect Results
- Temperature Control: Keep your heat low when melting the butter mixture to prevent scorching and ensure smooth texture throughout.
- Even Distribution: Use an offset spatula to spread each layer evenly, ensuring consistent thickness for uniform bars.
- Cracker Arrangement: Arrange crackers in the same direction for each layer to create clean, professional-looking cuts.
- Cooling Patience: Allow each component to cool slightly before adding the next layer to prevent melting and maintain distinct layers.
- Sharp Knife Technique: Use a sharp knife wiped clean between cuts for the cleanest edges and most attractive presentation.
Recipe Variations & Substitutions
Double Chocolate Decadence: Replace graham cracker crumbs with chocolate cookie crumbs and add cocoa powder to the filling for intense chocolate lovers.
Tropical Twist: Substitute peanut butter with coconut butter and add dried coconut flakes to the filling mixture for a vacation-inspired treat.
Salted Caramel Version: Add a pinch of sea salt to the filling and drizzle caramel sauce between layers for sophisticated flavor complexity.
Nut-Free Alternative: Replace peanut butter with sunflower seed butter or simply use additional melted chocolate for those with nut allergies.
Behind the Recipe
This recipe was born from a desire to recreate childhood memories while improving upon the original. The inspiration came from watching family members struggle to break apart those tiny Kit Kat segments, leading to the idea of creating larger, more generous portions with enhanced flavors. The addition of peanut butter wasn’t in the original concept but emerged during testing when a jar happened to be nearby, resulting in what many consider the perfect improvement to an already beloved treat.
The layering technique draws from traditional European torte-making methods, where multiple thin layers create complex textures and allow flavors to meld beautifully during the resting period.
Pairing Ideas
These rich Homemade Kit Kat Bars pair beautifully with a variety of beverages and complementary treats. Serve alongside freshly brewed coffee or espresso to balance the sweetness, or offer cold milk for a classic combination that never fails to satisfy.
For special occasions, consider pairing with vanilla ice cream or fresh berries to add contrasting textures and flavors. Sparkling water with a twist of lemon provides a palate-cleansing complement that allows you to fully appreciate each layer’s distinct characteristics.
Leftover & Reuse Ideas
Should you find yourself with leftover bars (though this rarely happens), they can be chopped and folded into vanilla ice cream for a spectacular homemade treat. Crumbled bars make excellent toppings for cheesecakes or can be incorporated into brownie batter for added texture and flavor complexity.
Individual pieces can be dipped in tempered chocolate for an even more decadent presentation, or crushed and used as a crust base for other desserts requiring a sweet, crunchy foundation.
Nutritional Information
Each bar contains approximately 276 calories, with 28g carbohydrates, 3g protein, and 17g fat. The sodium content is 231mg per serving, while fiber content reaches 1g and sugar totals 17g. These bars provide quick energy and satisfy sweet cravings effectively, making them perfect for special occasions when you want to indulge mindfully.
Serving Suggestions
Cut these Homemade Kit Kat Bars into small squares due to their rich nature – approximately 24 pieces from a 9×13 pan provides perfect portion control. Arrange on a decorative platter with parchment paper between layers for elegant presentation.
For parties, consider cutting into even smaller bite-sized pieces and serving on small dessert plates with dessert forks. The bars photograph beautifully, making them perfect for special celebrations where presentation matters as much as taste.
Common Mistakes to Avoid
Overheating the Filling: Allowing the butter mixture to boil can cause separation and grainy texture. Keep heat low and stir constantly for smooth results.
Insufficient Chilling: Cutting too early results in messy, unstable bars. Allow full chilling time for clean cuts and proper texture development.
Uneven Layers: Rushing the spreading process creates uneven bars with inconsistent texture. Take time to spread each layer evenly for professional results.
Wrong Pan Size: Using a different pan size affects thickness and chilling time. Stick to the 9×13-inch recommendation for best results.
Storage & Reheating Tips
Store covered in the refrigerator for up to one week, though they rarely last that long. For longer storage, wrap individual bars in plastic wrap and freeze for up to three months. Frozen bars can be enjoyed directly from the freezer or allowed to thaw for 10-15 minutes for softer texture.
Keep bars refrigerated until serving time, especially in warm weather, as the chocolate topping can soften at room temperature. If serving at parties, consider keeping them in a cool area or returning to refrigeration between servings.
Frequently Asked Questions
Can I make Homemade Kit Kat Bars without peanut butter? Absolutely! Simply use additional melted chocolate or substitute with your preferred nut or seed butter for the topping layer.
How long do Homemade Kit Kat Bars need to chill? Allow 1-2 hours for proper setting, though overnight chilling produces the cleanest cuts and best texture development.
What’s the best way to cut clean Homemade Kit Kat Bars? Use a sharp knife warmed under hot water and wiped clean between each cut for professional-looking edges.
Can I use different crackers for Homemade Kit Kat Bars? Yes! Saltines, graham crackers, or even vanilla wafers work well, each providing slightly different flavor profiles.
How should I store leftover Homemade Kit Kat Bars? Keep covered in the refrigerator for up to one week, or freeze wrapped individual bars for up to three months.
Conclusion
Homemade Kit Kat Bars
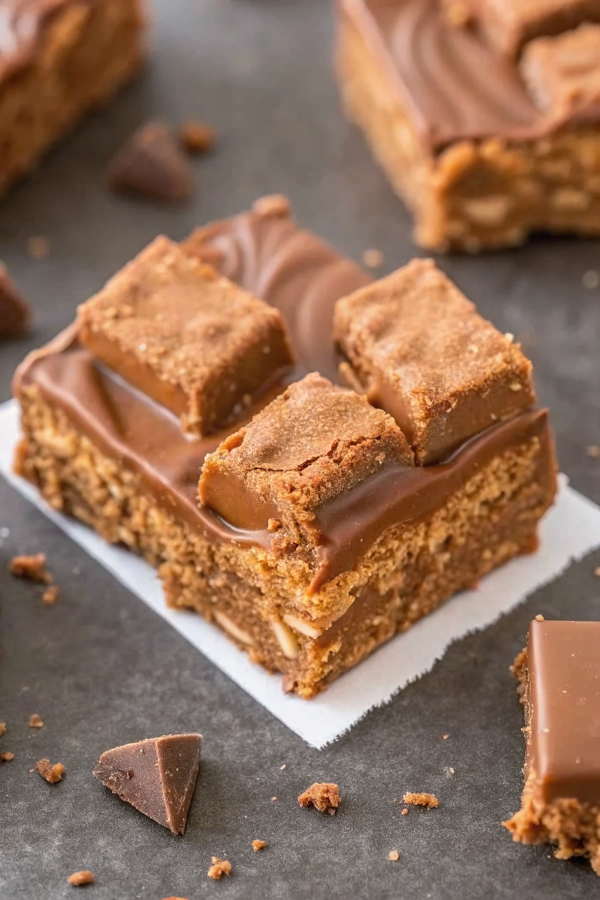
These Homemade Kit Kat Bars prove that sometimes the homemade version surpasses the original in every way. With their perfect balance of crispy layers, rich filling, and decadent chocolate-peanut butter topping, they deliver satisfaction that goes far beyond ordinary candy bars. The no-bake convenience makes them accessible to bakers of all skill levels, while the impressive results make them worthy of your most special occasions.
The beauty of this recipe lies not just in its simplicity, but in its ability to bring people together over something truly special. Whether you’re creating memories with children in the kitchen or impressing guests at your next gathering, these bars deliver joy in every bite.
Made this recipe? Drop your twist in the comments, rate the recipe, and tag us on Facebook, Instagram with #recipehoney.com we might feature your creation!

How to Make the Best Homemade Kit Kat Bars – Easy No-Bake Dessert
Ingredients
Instructions
- Prepare the baking dish: Line an ungreased 9×13-inch baking dish with a layer of club crackers.
- Make the graham cracker layer: In a large saucepan, over low to medium heat, melt butter and both sugars gently – while stirring. Stir in graham cracker crumbs and milk. Stir well until all is melted and combined (do not allow mixture to boil.) Remove from heat and carefully spread half the butter mixture evenly over crackers. Spread it out as evenly as possible. Layer with another layer of crackers. Then spread the other half of the butter mixture on top. Then a final layer of crackers on top of that.
- Add the chocolate peanut butter topping: In a small saucepan, combine peanut butter and chocolate chips. Melt over medium-low heat, stirring constantly until completely melted and blended. Spread evenly over top layer of crackers.
- Chill and serve: Cover with plastic wrap and pop it in the fridge for an hour or two. You want that top chocolate layer to really cool down and firm up. Once it is completely cooled, slice into small squares.