
Transform your Halloween party into an unforgettable experience with this show-stopping rat cake recipe that looks surprisingly realistic but tastes absolutely delicious. Finding unique Halloween desserts that impress guests while being achievable for home bakers can be challenging, but this comprehensive rat cake recipe provides everything you need for success. Our complete guide will walk you through creating professional-looking rat cakes using simple techniques and common ingredients, ensuring your Halloween celebration becomes the talk of the neighborhood.
Table of Contents
Rat Cake Recipe: Easy Halloween Themed Dessert Guide 2024
- Total Time: 1 hour 30 minutes (including chilling time)
- Yield: 8–10 servings 1x
Description
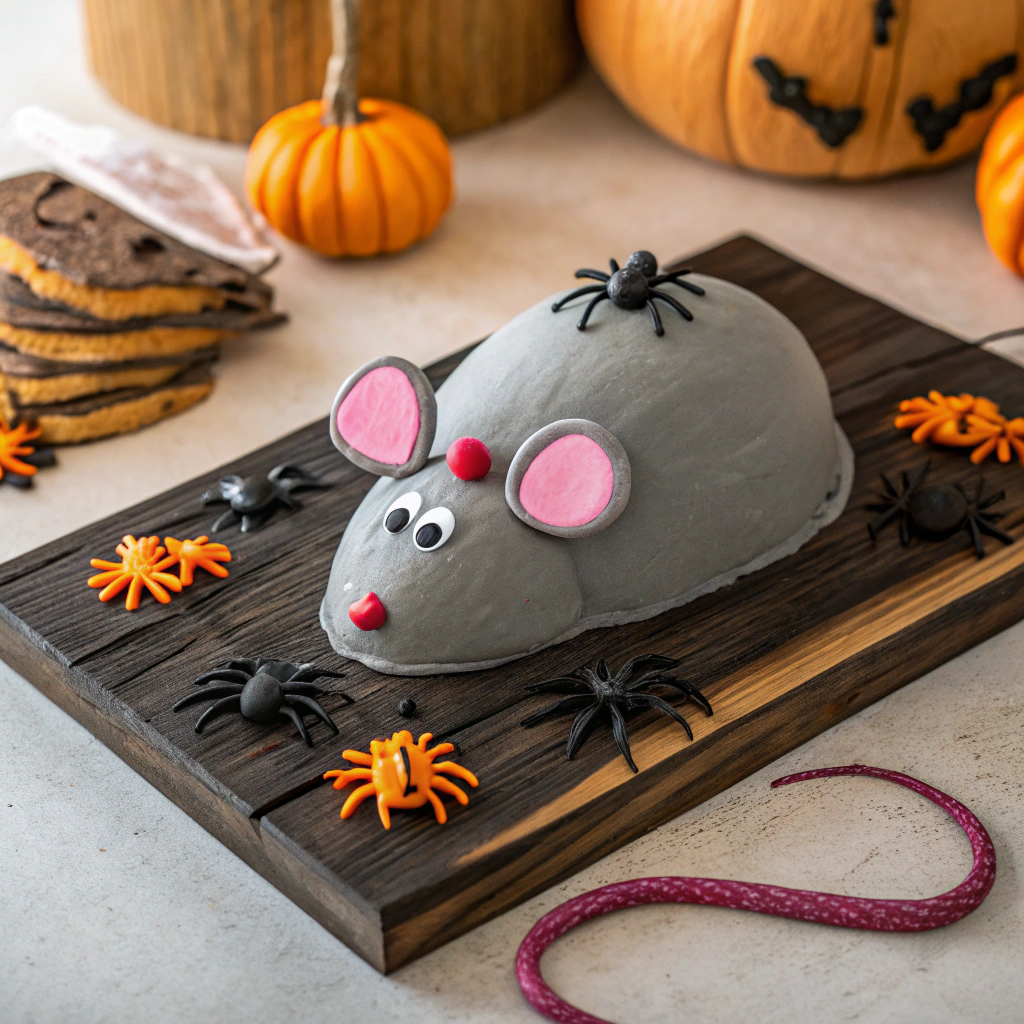
This Rat Cake Recipe is a fun, creative dessert perfect for themed parties, Halloween celebrations, or social media-worthy baking projects. With a loaf cake base and fondant details, this step-by-step guide helps you craft a realistic rat-shaped cake using professional techniques. Whether you’re a beginner or an experienced baker, this recipe offers tips, tricks, and variations to make your creation truly memorable.
Ingredients
- 650g loaf cake (homemade or shop-bought)
- 400g buttercream
- Grey or brown food coloring
- 50g pink fondant icing
- 10g black fondant icing
- 5g white fondant icing
- Cocoa powder (for dusting)
Instructions
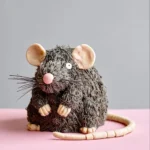
- Create the Rat Shape: Place the loaf cake on a cake board. Use a sharp knife to carve the basic rat shape, adding offcuts to build up areas as needed. Refer to an image for guidance, but feel free to make it as realistic or cartoonish as you like.
- Prepare the Buttercream: Add food coloring to the buttercream until you achieve the desired grey or brown shade. Apply a thin crumb coat layer over the entire cake using a small palette knife. Chill the cake in the fridge for 15 minutes.
- Pipe the Fur Texture: Fit a piping bag with a no. 234 piping nozzle and pipe buttercream all over the cake to create a fur-like texture. Experiment with pressure and speed for different fur lengths—press firmly and quickly for shorter fur, or gently and slowly for longer fur.
- Add Fondant Details: Shape the pink fondant into a tail, two ears, a nose, and four paws. Use a knife to cut individual toes on each paw. Attach these pieces to the cake, blending them with additional buttercream if needed.
- Finish with Eyes and Highlights: Roll two small balls of black fondant for the eyes and two tiny balls of white fondant for highlights. Brush cocoa powder lightly on the ears, nose, paws, and tail to add definition.
Notes
Tips & Tricks for Success:
- Flavor Variations: Customize the buttercream flavor to suit your taste—try chocolate, vanilla, or citrus for a unique twist.
- Fondant Handling: Keep unused fondant covered to prevent drying out, and use cornstarch sparingly to avoid cracking.
- Food Coloring: Start with a small amount of food coloring and gradually add more until you reach the desired shade.
- Storage: Store the completed cake in a cool, dry place. Avoid refrigeration to prevent condensation from ruining the fondant details.
- Alternative Designs: Not a fan of rats? Try shaping the cake into other animals, like a panda or bunny, using similar techniques.
- Prep Time: 45 minutes
- Cook Time: 0 minutes
- Category: Special Occasion Desserts
- Method: Baking & Sculpting
- Cuisine: Creative Baking
Nutrition
- Serving Size: 1 slice (approx. 1/10 of cake)
- Calories: 494
- Sugar: 52g
- Sodium: 1g
- Fat: 23g
- Saturated Fat: 14g
- Unsaturated Fat: 7g
- Trans Fat: 0g
- Carbohydrates: 66g
- Fiber: 0.7g
- Protein: 4.1g
- Cholesterol: 30mg
Essential Ingredients for Your Rat Cake Recipe
Creating the perfect rat cake recipe starts with gathering quality ingredients that will deliver both spectacular appearance and delicious taste. The foundation of any successful rat cake begins with a reliable chocolate cake base that holds its shape during carving while maintaining moisture and flavor.
Basic Chocolate Cake Ingredients
For the cake base, you’ll need 2 cups all-purpose flour, 1¾ cups granulated sugar, ¾ cup unsweetened cocoa powder, 2 teaspoons baking soda, 1 teaspoon baking powder, and 1 teaspoon salt. The wet ingredients include 2 large eggs, 1 cup strong black coffee (cooled), 1 cup whole milk, and ½ cup vegetable oil. This combination creates a dense, carving-friendly texture perfect for sculpting.
Fondant and Decorating Supplies
Professional-quality gray fondant forms the realistic exterior of your rat cake, though you can easily make your own by mixing white fondant with black gel food coloring. Essential decorating supplies include pink candy melts for ears, red candy pearls for eyes, black licorice strings for the tail, and edible silver dust for added realism. Small plastic rats can also serve as molds for reference.
Allergen-Free Substitutions
Following FDA allergen guidelines, several substitutions accommodate common dietary restrictions. Replace all-purpose flour with gluten-free baking flour in a 1:1 ratio. Substitute dairy milk with oat or almond milk, and use dairy-free butter alternatives. For egg-free versions, replace each egg with ¼ cup unsweetened applesauce or commercial egg replacer.
Where to Find Specialty Items
Most ingredients are available at standard grocery stores, but specialty items like gel food coloring and fondant tools may require visits to craft stores or online ordering. Many retailers now carry comprehensive cake decorating sections, making this rat cake recipe more accessible than ever before.
Step-by-Step Rat Cake Baking Instructions
Success with this rat cake recipe depends on proper preparation and timing. Begin by preheating your oven to 350°F (175°C) and greasing two 9-inch round pans plus one 6-inch round pan. The multiple sizes allow for better body proportioning in your final rat shape.
Preparing the Cake Batter
Combine all dry ingredients in a large mixing bowl, whisking thoroughly to eliminate lumps. In a separate bowl, beat eggs before adding milk, oil, and cooled coffee. The coffee enhances chocolate flavor without adding noticeable taste. Gradually combine wet and dry ingredients, mixing until just incorporated to avoid tough texture.
Shaping and Carving Techniques
Pour batter into prepared pans, filling each about two-thirds full. Bake for 25-30 minutes for smaller pans and 35-40 minutes for larger ones. Test doneness with a toothpick inserted in the center – it should come out with just a few moist crumbs. For perfect rat cake recipe results, consider our coffee pairing suggestions to complement your baking process.
Cooling and Preparation Tips
Cool cakes in pans for 10 minutes before turning onto wire racks. Complete cooling takes 2-3 hours and is crucial for successful carving. Wrapped cooled cakes can be refrigerated overnight, actually making them easier to carve and shape precisely.
Timing for Best Results
Plan your rat cake recipe timeline carefully. Baking requires 2-3 hours including cooling time. Carving and initial crumb coating need another 2 hours. Final decorating takes 3-4 hours for detailed work. Starting 1-2 days before your event ensures stress-free completion and better flavor development.
Professional Rat Cake Decorating Techniques
Mastering decorating techniques separates amateur attempts from professional-looking results in any rat cake recipe. The key lies in patience, proper tools, and understanding how fondant behaves during application and shaping.
Fondant Preparation and Application
Knead fondant until pliable, adding cornstarch if sticky. Roll to ¼-inch thickness on a clean, lightly powdered surface. Drape carefully over your carved cake, working from head to tail, smoothing gently to avoid air bubbles. Trim excess, leaving enough to tuck under the cake base. For advanced techniques, consult these professional fondant techniques for flawless application.

Creating Realistic Features
Realistic details make your rat cake recipe truly impressive. Shape small fondant pieces into pointed ears, attaching with water or edible glue. Create texture using toothpicks or modeling tools to simulate fur patterns. Form tiny paws from fondant, adding individual toe details for authenticity.
Color Mixing for Perfect Gray
Achieving natural rat coloring requires careful color mixing. Start with white fondant and add tiny amounts of black gel coloring, kneading thoroughly between additions. Add slight brown undertones for warmth. Always mix more than needed, as matching colors later proves nearly impossible.
Adding Finishing Touches
Final details bring your rat cake recipe to life. Position candy pearl eyes slightly angled for alertness. Attach pink fondant ear interiors for realism. Create whiskers using thin licorice strings or edible silver wire. Brush with edible silver dust for subtle sheen, mimicking real fur texture.
Creative Rat Cake Design Variations
Versatility makes this rat cake recipe perfect for various occasions beyond traditional Halloween celebrations. Different size options, color schemes, and themed adaptations expand your creative possibilities while maintaining the core techniques.
Size Variations for Different Occasions
Scale recipes up or down based on guest count and occasion. Individual mini rat cakes make charming party favors, while larger versions serve as impressive centerpieces. Use cupcake tins for single-serving versions, or double the recipe for grand displays serving 20+ people.
Color Alternatives
While gray remains traditional, creative color variations add festive flair. White fondant creates elegant “lab rat” versions perfect for science-themed parties. Brown coloring produces more realistic field mouse appearances. Even fantastical purple or blue versions work for children’s fantasy-themed celebrations.
Themed Adaptations
Adapt your rat cake recipe for different themes beyond Halloween. Add small witch hats for magical themes, or create cheese props for comedic presentations. For sophisticated gatherings, consider pairing with our complementary Butterbeer Float recipe for a complete themed menu.
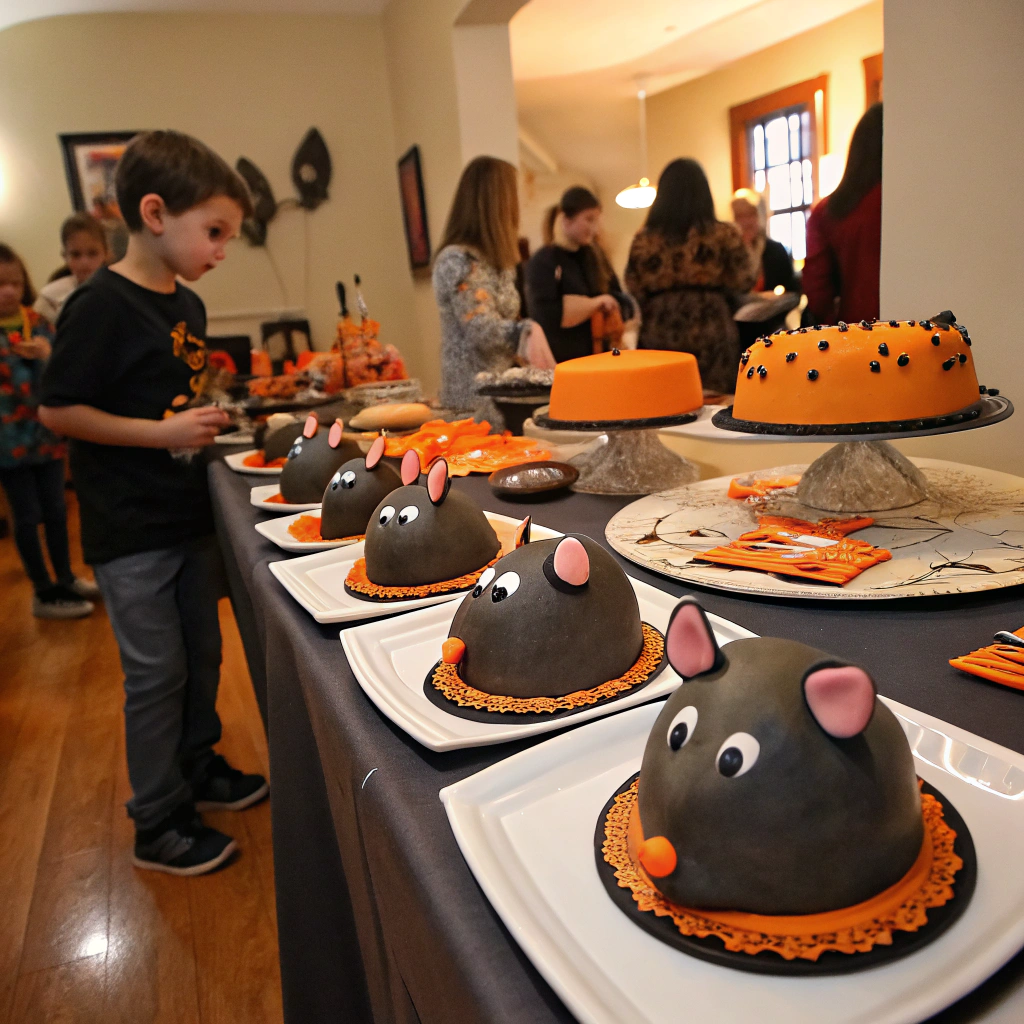
Group Display Ideas
Multiple rats create dramatic impact. Arrange various sizes to suggest families. Position around fake cheese wheels or in miniature mazes. Use artificial greenery to simulate natural habitats, making your rat cake recipe the centerpiece of elaborate themed displays.
Make-Ahead Tips and Storage Solutions
Proper planning ensures your rat cake recipe stays fresh and beautiful from preparation through serving. Understanding storage requirements and assembly timing prevents last-minute stress while maintaining optimal taste and appearance.
Timeline Planning
Begin cake components three days before your event. Bake cakes on day one, wrap tightly, and refrigerate. Complete carving and crumb coating on day two. Final decorating happens on day three, allowing detailed work without time pressure. This schedule ensures your rat cake recipe delivers both visual impact and fresh flavor.
Proper Storage Methods
Store decorated cakes in cool, dry environments away from direct light. Refrigeration helps fondant set but may cause condensation upon removal. Follow USDA cake storage guidelines for food safety, keeping decorated cakes no longer than 3-4 days for optimal quality.
Assembly Day Preparation
Final assembly involves positioning decorative elements and adding fresh garnishes. Remove from refrigeration 30 minutes before serving to reach optimal temperature. Add delicate decorations like whiskers and small details just before presentation to prevent damage.
Transportation Tips
Transport your rat cake recipe creation safely using sturdy cake boxes with adequate height clearance. Secure loose decorations separately and reattach upon arrival. Use non-slip mats in vehicles to prevent sliding during transport.
Troubleshooting Common Rat Cake Challenges
Even experienced bakers encounter obstacles when creating elaborate designs. Understanding common problems and their solutions ensures your rat cake recipe succeeds regardless of unexpected challenges during preparation or decorating phases.
Fixing Cracked Fondant
Fondant cracks result from rolling too thin, working in dry conditions, or stretching during application. Small cracks can be smoothed with gentle finger pressure and water. Larger damages require patching with fresh fondant pieces, blended carefully to hide seams. Prevention involves proper humidity control and gradual stretching during application.
Repairing Broken Decorations
Delicate features like ears and tails break easily during handling. Keep extra fondant in matching colors for emergency repairs. Edible glue or water reattaches small pieces effectively. For complete reconstruction, remove damaged elements entirely and recreate rather than attempting inadequate patches that compromise your rat cake recipe appearance.
Texture Problems
Dense or gummy cake textures result from overmixing batter or incorrect measurements. If discovered after baking, strategic trimming removes problem areas. Dry cakes benefit from simple syrup applications before fondant covering. Future prevention requires careful measuring and gentle mixing techniques.
Last-Minute Solutions
Time constraints sometimes force creative alternatives in your rat cake recipe execution. Store-bought chocolate cakes work adequately for carving bases. Pre-made fondant saves significant time over homemade versions. Focus efforts on final decorating details that create the biggest visual impact rather than perfecting hidden structural elements.
Frequently Asked Questions
Can I make this rat cake recipe ahead of time for my Halloween party?
Yes, this rat cake recipe works perfectly for advance preparation. Bake cake components 2-3 days ahead and store wrapped in the refrigerator. Complete carving and crumb coating one day before your event. Final decorating can be done the morning of your party for optimal freshness and appearance.
What size rat cake recipe works best for feeding 12 people?
A 9×13 inch base cake provides adequate servings for 12 people when carved into rat shape. This rat cake recipe can be scaled up by using two 9-inch round layers plus one 6-inch layer for the head, creating a larger rat that comfortably serves 15-20 guests.
How do I make this rat cake recipe gluten-free or dairy-free?
Convert any rat cake recipe to accommodate dietary restrictions using tested substitution ratios. Replace all-purpose flour with gluten-free blend in 1:1 ratio, substitute dairy milk with plant-based alternatives like oat or almond milk, and use dairy-free butter. Results remain delicious while being inclusive.
What tools do I need for this rat cake recipe besides basic baking supplies?
Essential decorating tools for this rat cake recipe include fondant rolling pin, smoothing tools, small modeling tools for details, and food coloring. Household alternatives work well – use regular rolling pin with plastic wrap, spoons for smoothing, and toothpicks for detail work.
How long does it take to complete this rat cake recipe from start to finish?
Complete rat cake recipe timeline spans 8-10 hours total work time spread over 2-3 days. Baking requires 3-4 hours including cooling, carving takes 2 hours, and detailed decorating needs 4-5 hours for professional-looking results.
Can children help make this rat cake recipe safely?
Children can safely participate in age-appropriate tasks during this rat cake recipe preparation. Young helpers can measure ingredients, mix batter, and assist with simple decorating tasks like rolling fondant. Adult supervision ensures safety during oven use and detailed carving work.
This comprehensive rat cake recipe transforms ordinary baking ingredients into extraordinary Halloween centerpieces that delight guests of all ages. The versatility accommodates different skill levels while providing professional-looking results through careful planning and proper technique execution. Whether creating your first novelty cake or adding to your repertoire of impressive desserts, this rat cake recipe delivers both visual impact and delicious taste that makes your Halloween celebration truly memorable.
Remember that successful cake decorating is a learning process, and each attempt improves your skills and confidence. Share your creations with friends and family, and don’t forget to consider balanced treat consumption as part of maintaining healthy lifestyle choices while enjoying festive celebrations. Start planning your rat cake masterpiece today, and prepare to amaze everyone at your next Halloween gathering with this show-stopping dessert that’s sure to be the highlight of your party.