
Why Death By Chocolate Poke Cake Matters
When it comes to creating memorable desserts that satisfy even the most intense chocolate cravings, few recipes can compete with the indulgent appeal of chocolate-focused treats. For those seeking seasonal inspiration, you might enjoy exploring our no-bake chocolate eclair cake or our collection of death by chocolate cupcakes for individual servings. The Pioneer Woman’s Best Christmas Poke Cake Recipe offers wonderful seasonal variations, while the baking community on Reddit discusses the best chocolate desserts you can create in an hour or less.
The poke cake technique originated in the 1970s when home bakers discovered that poking holes in warm cake and filling them with pudding or gelatin created incredibly moist, flavorful desserts. This method revolutionized home baking by making it possible to infuse cakes with multiple layers of flavor and texture. The “Death By Chocolate” variation emerged as chocolate lovers pushed the boundaries, combining every possible chocolate element into one spectacular dessert.
What makes this particular version special is its sophisticated layering system. Unlike simple chocolate cakes, this dessert builds flavor through distinct chocolate components that work together harmoniously. The technique has evolved from basic poke cakes to become a canvas for creative expression, allowing bakers to experiment with different chocolate intensities and textures.
Death By Chocolate Poke Cake Ingredients
Ingredient Spotlight
Dark Chocolate Cake Mix: The foundation provides structure and the first layer of chocolate flavor. Dark chocolate varieties offer more complex cocoa notes compared to regular chocolate mixes, creating a sophisticated base that can support the additional chocolate layers without becoming overwhelming.
Instant Dark Chocolate Pudding Mix: This dual-purpose ingredient serves as both the hole-filling component and the topping base. Instant pudding creates the signature smooth, creamy texture that defines poke cakes while adding concentrated chocolate flavor that penetrates throughout the cake.
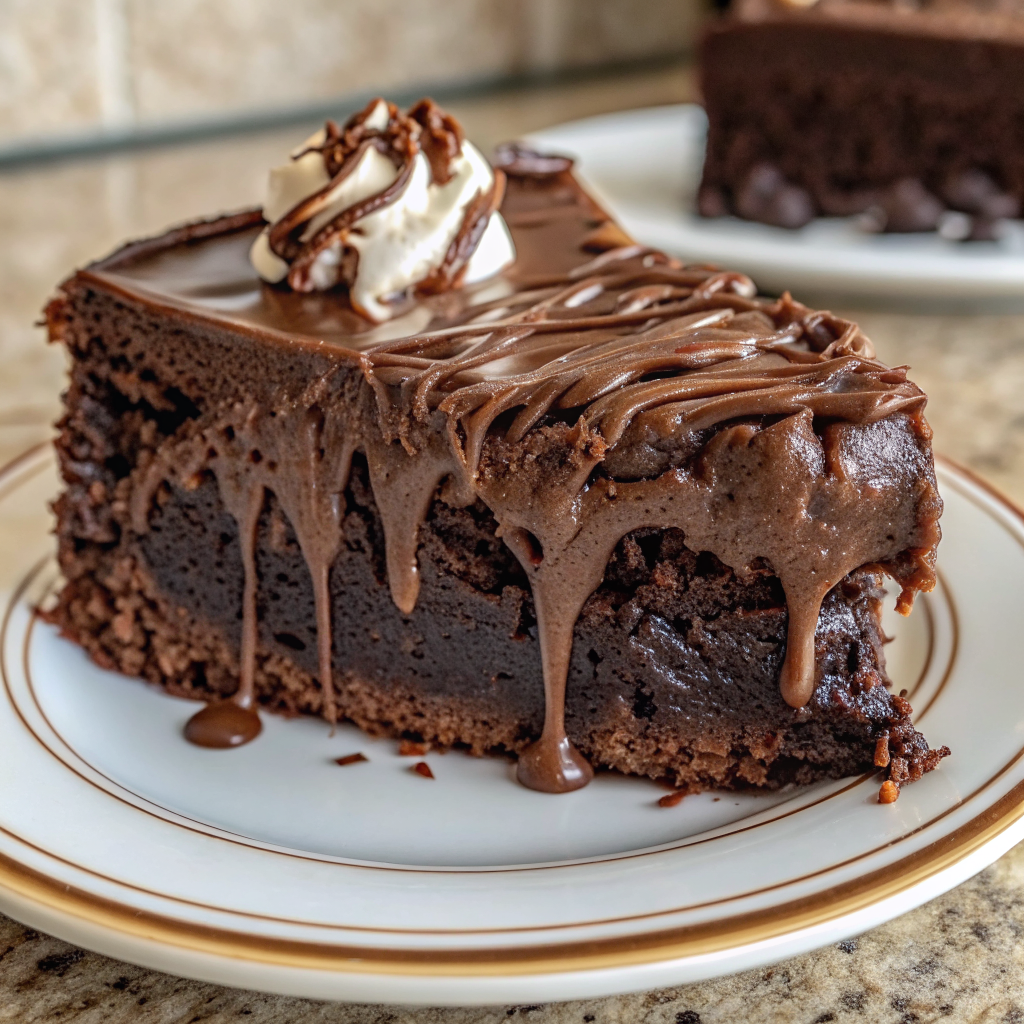
Hershey’s Special Dark Chocolate Topping: This liquid chocolate layer acts as a flavor bridge between the cake and pudding layers. When warmed, it flows easily into the pudding-filled holes, creating marbled chocolate veins throughout the dessert.
Frozen Whipped Topping: Provides lightness and textural contrast to balance the rich chocolate elements. The airy consistency prevents the dessert from becoming too dense while adding a creamy finish that complements the chocolate intensity.
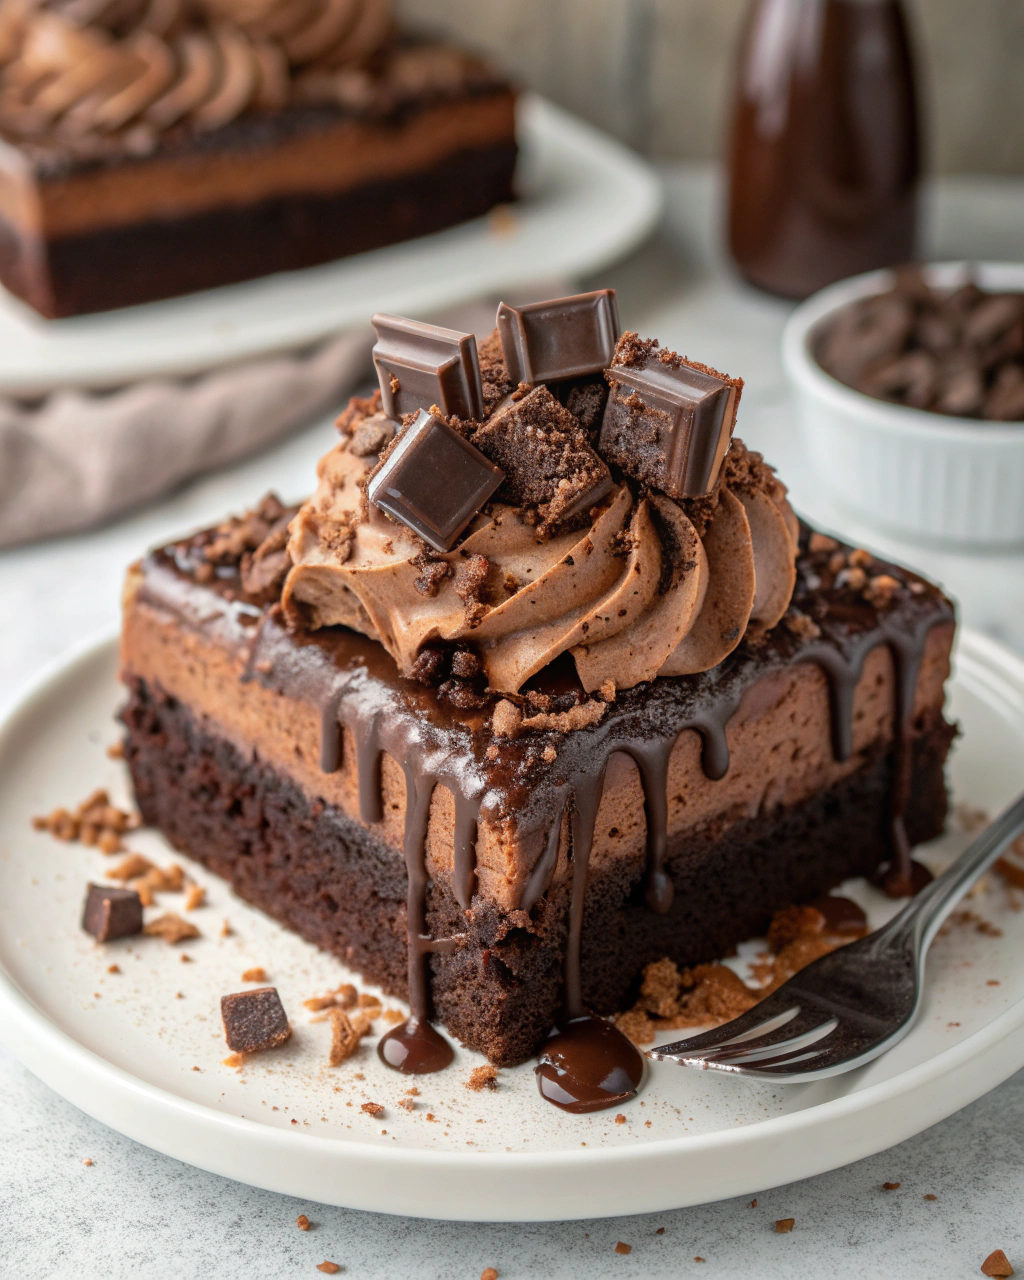
Giant Dark Chocolate Candy Bar: The chopped pieces create textural interest and provide bursts of pure chocolate flavor. The candy adds visual appeal and gives each bite varying chocolate intensities.
Complete Ingredient List
For the Cake:
- 1 package dark chocolate cake mix (15.25 oz)
- Ingredients listed on cake mix box (typically eggs, oil, water)
- 1 box instant Hershey’s Special Dark Chocolate Pudding mix (3.56 oz)
- 4 cups whole milk, divided
- 1 box Hershey’s Special Dark Chocolate topping (12.8 oz)
For the Topping:
- 1 box instant Hershey’s Special Dark Chocolate Pudding mix (3.56 oz)
- 1 container frozen whipped topping, thawed (8 oz)
- 1 Giant Hershey Dark Chocolate candy bar, chopped (6.8 oz)
Substitution Ideas
Cake Mix Alternatives: Homemade chocolate cake works beautifully, or try devil’s food cake mix for extra richness. For dietary restrictions, gluten-free chocolate cake mix produces excellent results.
Pudding Variations: Chocolate fudge pudding intensifies the chocolate flavor, while milk chocolate creates a milder taste. Sugar-free pudding works for reduced-sugar versions.
Topping Options: Heavy cream whipped with powdered sugar can replace frozen whipped topping. For extra indulgence, try chocolate whipped cream or cream cheese frosting.
Timing
Preparation Time: 20 minutes
Chilling Time: 4 hours minimum
Total Time: 4 hours 53 minutes
This recipe requires 25% less active preparation time than traditional layer cakes while delivering significantly more chocolate impact. The extended chilling time allows flavors to meld and creates the perfect sliceable texture.
Step-by-Step Instructions for Perfect Death By Chocolate Poke Cake
Step 1: Prepare the Cake Foundation
Bake the dark chocolate cake according to package directions in a 9×13-inch pan. The key is achieving the perfect doneness – a toothpick should come out with just a few moist crumbs attached. Overbaking will result in a dry base that won’t absorb the pudding properly.
Step 2: Create the First Pudding Layer
While the cake bakes, whisk together one box of pudding mix with 2 cups of cold milk. Mix for exactly 2 minutes to ensure proper thickening. The consistency should be smooth and pourable but beginning to set.
Step 3: Poke and Fill
Using the round end of a wooden spoon, poke holes throughout the hot cake, spacing them about 1 inch apart. The holes should go about halfway through the cake. Slowly pour the prepared pudding over the cake, using a spatula to guide it into the holes.
Step 4: Add the Chocolate Topping Layer
Microwave the chocolate topping with the lid removed for 45 seconds, stirring halfway through. It should pour easily but not be scorching hot. Drizzle evenly over the pudding-filled cake, creating a glossy chocolate layer.
Step 5: Cool Completely
Allow the cake to cool to room temperature, about 1 hour. This step is crucial for proper layer formation and prevents the final topping from melting.
Step 6: Prepare the Final Topping
Mix the second box of pudding with remaining 2 cups of milk. Once thickened, gently fold in the thawed whipped topping using a rubber spatula. Fold just until combined to maintain the light, airy texture.
Step 7: Assemble and Garnish
Spread the pudding-whipped topping mixture evenly over the cooled cake. Sprinkle the chopped chocolate candy bar pieces over the top, pressing gently to ensure they adhere.
Step 8: Chill and Set
Refrigerate for at least 4 hours or overnight. This chilling time allows all layers to set properly and flavors to meld into chocolate perfection.
Tips & Tricks for Perfect Results
- Temperature Control: Always poke holes in hot cake but add final topping only after complete cooling to prevent melting.
- Hole Spacing: Make holes approximately 1 inch apart and ½ inch deep for optimal pudding distribution without structural damage.
- Pudding Consistency: Mix pudding for exactly 2 minutes – under-mixing results in thin consistency while over-mixing can cause lumps.
- Chocolate Topping Technique: Heat chocolate topping in 15-second intervals, stirring between each, to prevent overheating and maintain smooth texture.
- Folding Method: Use a rubber spatula and gentle folding motions when combining whipped topping with pudding to maintain airiness.
Recipe Variations & Substitutions
Triple Chocolate Mint: Add 1 teaspoon mint extract to the final pudding layer and garnish with crushed chocolate mint cookies instead of candy bar pieces.
Mocha Madness: Replace 1 cup of milk with strong cooled coffee and add 2 tablespoons instant espresso powder to the cake mix.
Peanut Butter Chocolate: Swirl 3 tablespoons warmed peanut butter into the final topping and garnish with chopped peanut butter cups.
Healthier Version: Use sugar-free pudding mixes, light whipped topping, and reduce candy bar garnish by half for a lighter option that still delivers chocolate satisfaction.
Behind the Recipe
This Death By Chocolate Poke Cake emerged from the desire to create the ultimate chocolate experience in a single dessert. The inspiration came from watching family members at gatherings gravitating toward anything chocolate, often taking multiple chocolate desserts. The challenge was creating something that would satisfy every type of chocolate craving – from those who love cake to pudding enthusiasts to candy lovers.
The layering technique developed through experimentation with different chocolate intensities and textures. Each component was chosen to complement rather than compete with the others, creating a harmonious chocolate symphony that builds in complexity with every bite.
Pairing Ideas
Beverage Pairings: Cold milk remains the classic choice, while rich coffee or espresso provides sophisticated contrast. For special occasions, try hot chocolate with marshmallows or vanilla-flavored sparkling water to cleanse the palate.
Complementary Sides: Fresh berries add bright acidity that cuts through the richness. Vanilla ice cream creates a delightful temperature contrast, while salted nuts provide textural variety and flavor balance.
Leftover & Reuse Ideas
Transform leftover cake into chocolate trifle by layering pieces with fresh whipped cream and berries in glass containers. Crumble pieces over vanilla ice cream for an instant sundae, or blend with milk for an indulgent chocolate milkshake. Small pieces can be frozen and enjoyed as individual chocolate cake bites.
Nutritional Information
Each serving contains approximately 285 calories, with 8 grams of fat, 52 grams of carbohydrates, and 4 grams of protein. The dessert provides calcium from the milk components and antioxidants from the dark chocolate elements. This recipe serves 24, making it perfect for large gatherings.
Serving Suggestions
Cut into clean squares using a sharp knife wiped between cuts for the most attractive presentation. Serve on chilled plates to maintain the layered structure. For elegant presentation, dust with cocoa powder or add a small fresh mint sprig. The dessert photographs beautifully when cut to show the distinct layers.
Common Mistakes to Avoid
Rushing the Cooling Process: Adding the final topping to warm cake causes melting and layer separation. Always wait for complete cooling.
Overmixing the Final Topping: Aggressive mixing deflates the whipped topping, resulting in a dense rather than light final layer.
Inadequate Chilling Time: Cutting before proper chilling results in messy, unstable slices that don’t showcase the beautiful layers.
Uneven Hole Distribution: Concentrating holes in certain areas creates soggy spots while leaving other areas dry.
Storage & Reheating Tips
Store covered in the refrigerator for up to 5 days. The cake actually improves after the first day as flavors continue to meld. For longer storage, individual pieces can be wrapped and frozen for up to 3 months. Thaw frozen pieces in the refrigerator overnight. This dessert is best served chilled and should not be reheated.
FAQs
Can I make Death By Chocolate Poke Cake ahead of time?
Yes, this dessert is actually better when made 1-2 days ahead. The extended chilling time allows all flavors to meld perfectly, and the texture becomes more cohesive for easier slicing.
What’s the best way to get clean slices of Death By Chocolate Poke Cake?
Use a sharp knife and wipe it clean with a damp cloth between each cut. Chilling the knife in the freezer for a few minutes before cutting also helps achieve cleaner slices.
Can I substitute homemade chocolate cake for the Death By Chocolate Poke Cake mix?
Absolutely! Any moist chocolate cake recipe works well. Just ensure the cake is baked in a 9×13-inch pan and follow the same poking and filling technique.
How do I prevent the Death By Chocolate Poke Cake layers from becoming soggy?
The key is timing – poke holes in hot cake for pudding absorption, but ensure the cake is completely cool before adding the whipped topping layer.
What chocolate alternatives work for the Death By Chocolate Poke Cake candy garnish?
Chocolate chips, chopped brownies, crushed chocolate cookies, or even chocolate shavings all work beautifully as garnish alternatives.
Conclusion
Death By Chocolate Poke Cake
This Death By Chocolate Poke Cake delivers everything its name promises – an intensely satisfying chocolate experience that combines multiple textures and flavors into one spectacular dessert. The layering technique creates a dessert that’s both visually impressive and incredibly delicious, while the make-ahead nature makes it perfect for entertaining. Whether you’re celebrating a special occasion or simply indulging your chocolate cravings, this recipe provides the ultimate chocolate satisfaction that will have everyone asking for seconds.
Made this recipe? Drop your twist in the comments, rate the recipe, and tag us on Facebook, Instagram with #recipehoney.com we might feature your creation!

Death By Chocolate Poke Cake Easy Ultimate Recipe
Ingredients
Instructions
- Bake the Cake: Preheat oven and prepare cake batter according to package directions using a 9x13-inch baking pan. Bake until a toothpick inserted in the center comes out clean.
- Prepare Pudding Mixture: In a medium bowl, whisk together the first box of instant chocolate pudding mix with 2 cups of milk for 2 minutes until slightly thickened.
- Poke and Pour: While the cake is still hot, use the round end of a wooden spoon to poke holes all over the top. Slowly pour the pudding mixture over the cake, ensuring it seeps into the holes.
- Add Chocolate Topping: Microwave the jar of Hershey's Special Dark Chocolate topping (lid off) for about 45 seconds or until pourable. Pour evenly over the top of the cake.
- Cool the Cake: Let the cake cool completely to room temperature.
- Make Mousse Layer: In a medium bowl, combine the second box of instant chocolate pudding mix with the remaining 2 cups of milk. Whisk for 2 minutes until thick.
- Fold in Whipped Topping: Carefully fold the thawed frozen whipped topping into the pudding mixture until fully incorporated and smooth.
- Top the Cake: Spread the whipped topping and pudding mixture evenly over the cooled cake.
- Add Candy Bar Topping: Sprinkle the chopped Giant Hershey Dark Chocolate candy bar over the top of the cake.
- Chill: Refrigerate for at least 4 hours to allow the cake to set and flavors to meld.
- Store: Store the cake covered in the refrigerator.