
Why Easy No-Knead Brioche Rolls Matter
Understanding the science behind bread-making can transform your baking experience. For those interested in exploring beautiful burger buns or perfecting the best chocolate brioche doughnuts, mastering no-knead techniques is essential. The Kneading Bread Dough Is a Waste of Time | No-Knead Method demonstrates how time and hydration can replace traditional kneading, while sourcing quality ingredients from reliable suppliers, as discussed in Where do you get your bread flour? | r/Breadit, ensures consistent results.
Brioche originated in 16th-century France as a luxury bread reserved for special occasions and wealthy households. The traditional method required extensive kneading to develop the gluten structure necessary for incorporating large amounts of butter and eggs. However, modern food science has revealed that extended fermentation can achieve similar results through enzymatic action and gluten development over time.
The no-knead revolution began with Jim Lahey’s groundbreaking technique in the early 2000s, which proved that time could replace mechanical manipulation. This method allows home bakers to create professional-quality bread without specialized equipment or advanced techniques. The long, slow fermentation process not only develops complex flavors but also breaks down proteins, making the bread easier to digest.
Easy No-Knead Brioche Rolls Ingredients
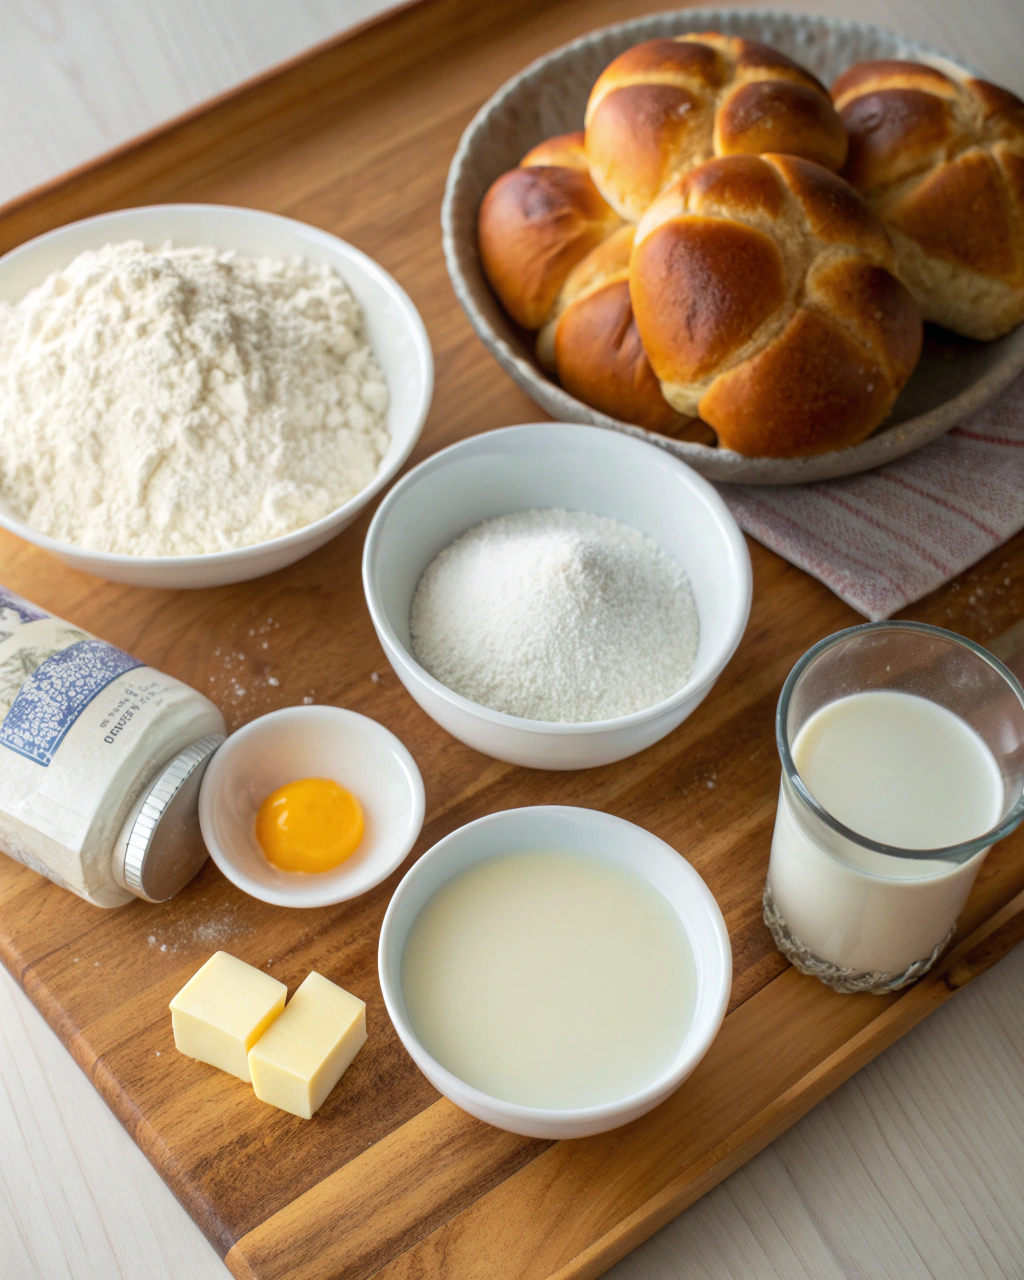
Ingredient Spotlight
Bread Flour vs. All-Purpose Flour: While all-purpose flour works perfectly, bread flour contains higher protein content (12-14% vs. 10-12%), creating stronger gluten networks that support the rich, tender crumb characteristic of brioche. The extra protein helps trap gases produced during fermentation, resulting in better rise and structure.
Instant Yeast: This fine-granulated yeast dissolves quickly and doesn’t require proofing, making it ideal for no-knead methods. It provides consistent fermentation and can be mixed directly with dry ingredients. If using active dry yeast, increase the amount by 25% and ensure your liquid ingredients are slightly warmer.
Cold Water Technique: Starting with cold water slows initial fermentation, allowing flavors to develop gradually. This technique prevents over-proofing and gives you more flexibility with timing, especially important for busy schedules.
Butter Integration: Melted butter incorporates more easily than cold butter in no-knead methods. The fat creates tender layers and contributes to the characteristic rich flavor. Using European-style butter with higher fat content (82% vs. 80%) will enhance the final texture.
Egg Power: Eggs serve multiple functions: they add richness, create structure through proteins, contribute to the golden color, and help with moisture retention. The lecithin in egg yolks acts as a natural emulsifier, helping fats and liquids blend smoothly.
Complete Ingredient List
For the Dough:
- Bread or all-purpose flour: 4 cups (512 g)
- Kosher salt: 2 teaspoons (10 g)
- Instant yeast: 2 teaspoons (8 g)
- Sugar: 2 tablespoons (28 g)
- Cold water: 1 1/3 cups (300 g)
- Large egg: 1
- Warm milk: 1/3 cup (78 g)
- Melted butter: 4 tablespoons (57 g)
For the Egg Wash:
- Egg: 1, beaten with 1 tablespoon water
Smart Substitutions
- Dairy-Free Option: Replace milk with oat milk or coconut milk, and use plant-based butter
- Egg Substitute: Use aquafaba (3 tablespoons per egg) for vegan versions
- Sugar Alternatives: Honey or maple syrup can replace sugar (reduce liquid slightly)
- Gluten-Free Adaptation: Use a 1:1 gluten-free flour blend with added xanthan gum
Timing for Perfect Easy No-Knead Brioche Rolls
- Preparation Time: 15 minutes
- First Rise: 2-3 hours (or overnight in refrigerator)
- Shaping and Second Rise: 45 minutes
- Baking Time: 15-20 minutes
- Total Active Time: 1 hour
- Total Time: 4-5 hours
This timing is approximately 40% faster than traditional brioche methods, which typically require multiple kneading sessions and longer rising periods. The beauty of this no-knead approach lies in its flexibility you can start the dough in the morning for evening rolls, or begin the night before for fresh breakfast pastries.
Step-by-Step Instructions for Easy No-Knead Brioche Rolls
1. Create the Dry Foundation
Whisk together flour, salt, yeast, and sugar in a large mixing bowl until evenly distributed. This ensures the salt doesn’t come into direct contact with the yeast initially, preventing any inhibition of fermentation. The sugar feeds the yeast and contributes to browning during baking.
2. Prepare the Liquid Base
In a medium bowl, whisk the cold water and egg until completely combined. The cold temperature helps control fermentation timing and makes the dough easier to handle initially.
3. Create the Warm Mixture
Heat milk and butter in a small saucepan over low heat until the butter melts completely. Don’t let it boil. Pour this warm mixture into the cold water and egg combination, stirring gently. The temperature should feel comfortably warm to touch, around 100°F.
4. Form the Dough
Pour the liquid mixture into the flour mixture and use a spatula to combine until a sticky, shaggy dough forms. Don’t worry about smoothness the long fermentation will develop the texture. The dough should be quite wet and sticky.
5. Oil and Rise
Lightly coat the dough surface with olive oil, rubbing it gently to prevent sticking. Cover with plastic wrap or a damp towel. Let rise in a warm spot for 2-3 hours until doubled, or refrigerate overnight for enhanced flavor development.
6. Shape with Care
Turn the risen dough onto a lightly floured surface and gently deflate. Divide into 8-10 equal portions using a bench scraper or knife. Shape each piece into a smooth ball by tucking the edges underneath, using just enough flour to prevent sticking.
7. Final Rise
Place shaped rolls on a parchment-lined baking sheet, spacing them about 2 inches apart. Cover lightly and let rise for 30-45 minutes until noticeably puffed and light to touch.
8. Prepare for Baking
Preheat your oven to 425°F during the last 15 minutes of rising. Beat one egg with a tablespoon of water for the wash. Gently brush the tops of each roll with egg wash for that beautiful golden finish.
9. Bake to Perfection
Bake for 15-20 minutes until deep golden brown all over. The internal temperature should reach 190°F. The rolls will sound hollow when tapped on the bottom.
10. Cool and Serve
Transfer to a wire rack to cool completely before storing, or serve warm with butter while still slightly warm for the ultimate indulgence.
Tips & Tricks for Perfect Results
- Temperature Matters: Use a kitchen thermometer to ensure your liquid mixture is around 100°F too hot will kill the yeast, too cold will slow fermentation significantly.
- Humidity Control: Create a warm, humid environment for rising by placing the covered bowl near a warm oven or on top of the refrigerator. In dry climates, place a pan of warm water nearby.
- Flour Management: Use minimal flour when shaping to maintain the soft texture. Too much flour will create tough spots in the finished rolls.
- Even Sizing: Use a kitchen scale to divide dough portions equally this ensures uniform baking and professional appearance.
- Steam Secret: Place a small oven-safe dish of hot water on the bottom rack during the first 10 minutes of baking to create steam, which promotes better crust development and shine.
Recipe Variations & Substitutions
Herb Garden Rolls: Add 2 tablespoons of mixed fresh herbs (rosemary, thyme, chives) to the dry ingredients for savory applications. These pair beautifully with soups and salads.
Sweet Cinnamon Version: Incorporate 1 teaspoon of cinnamon and 1 tablespoon of brown sugar into the flour mixture. Brush finished rolls with melted butter and sprinkle with cinnamon sugar while warm.
Orange Zest Delight: Add the zest of one large orange to the dough and replace 2 tablespoons of milk with fresh orange juice. These make exceptional breakfast rolls.
Whole Wheat Variation: Replace up to half the bread flour with whole wheat flour for added nutrition and nutty flavor. Increase the liquid by 2-3 tablespoons as whole wheat absorbs more moisture.
Behind the Recipe
This recipe was born from countless weekend mornings when the craving for fresh brioche struck, but the thought of traditional kneading felt overwhelming. After experimenting with various no-knead techniques and studying the science behind gluten development, I discovered that patience truly could replace elbow grease. The breakthrough came when I realized that the combination of proper hydration, gentle handling, and extended fermentation could create the same luxurious texture that makes brioche so beloved. Each batch taught me something new about timing, temperature, and the magic that happens when simple ingredients are given time to transform.
Pairing Ideas
Morning Combinations: Serve warm with homemade jam, honey butter, or fresh fruit preserves. These rolls are exceptional with scrambled eggs and fresh berries for a complete breakfast.
Beverage Pairings: Fresh coffee, chai tea, or hot chocolate complement the rich, buttery flavors perfectly. For afternoon tea, pair with Earl Grey or English Breakfast tea.
Savory Applications: Use as slider buns for pulled chicken or turkey. They also make excellent sandwich rolls for deli meats with their tender crumb and sturdy structure.
Elegant Accompaniments: Serve alongside soup courses, particularly cream-based or vegetable soups. The rolls are perfect for sopping up every last drop.
Leftover & Reuse Ideas
French Toast Transformation: Day-old rolls make extraordinary French toast. Slice thickly and soak in a rich custard base for an indulgent breakfast treat.
Bread Pudding Base: Cube leftover rolls for bread pudding, either sweet with vanilla and fruit, or savory with cheese and herbs for a side dish.
Breadcrumb Production: Dry completely and process into fine breadcrumbs for coating fish or chicken. The rich flavor adds depth to any breaded dish.
Stuffing Enhancement: Use as a base for holiday stuffing the buttery flavor elevates traditional recipes significantly.
Nutritional Information
Per roll (based on 8 servings): Approximately 285 calories, 8g protein, 45g carbohydrates, 8g fat, 2g fiber. These rolls provide B vitamins from the enriched flour, protein from eggs and milk, and essential fats from butter. The fermentation process also creates beneficial compounds that aid digestion.
Serving Suggestions
Presentation Tips: Arrange rolls in a cloth-lined basket for rustic charm, or on a wooden board with small bowls of butter and preserves. Dust lightly with flour before baking for an artisanal appearance.
Temperature Serving: These rolls are delicious at any temperature. Serve warm for maximum butter-melting potential, or at room temperature for better flavor appreciation.
Portion Planning: Plan for 1-2 rolls per person as a side, or 2-3 if serving as the main bread course with soup or salad.
Common Mistakes to Avoid
Over-Flouring: Adding too much flour during shaping creates dense spots. The dough should remain slightly sticky for optimal texture.
Rushing the Rise: Insufficient rising time results in dense, heavy rolls. The dough should visibly double in size during the first rise and feel light and airy after the second rise.
Temperature Extremes: Too-hot liquids kill yeast, while too-cold environments halt fermentation. Aim for the “just right” zone around 75-80°F for rising.
Overbaking: These rolls can go from golden to overdone quickly. Check at 15 minutes and look for deep golden brown color rather than timing alone.
Skipping Egg Wash: The egg wash creates the signature shiny, golden crust that makes these rolls bakery-worthy. Don’t skip this crucial step.
Storage & Reheating Tips
Short-term Storage: Store completely cooled rolls in an airtight container at room temperature for up to 3 days. Place a paper towel in the container to absorb excess moisture.
Freezing Instructions: Wrap individual rolls in plastic wrap and freeze for up to 3 months. Thaw at room temperature for 2 hours before serving.
Reheating Methods: Warm in a 300°F oven for 5-7 minutes, or wrap in damp paper towels and microwave for 15-20 seconds. For crispy exteriors, brush with butter before oven reheating.
Freshness Revival: Lightly mist day-old rolls with water and warm in the oven for 3-4 minutes to restore softness.
FAQs
Can I make Easy No-Knead Brioche Rolls without a stand mixer?
Absolutely! This recipe is designed for hand mixing only. Use a large spoon or spatula to combine ingredients no special equipment required.
How do I know when my Easy No-Knead Brioche Rolls are properly risen?
The dough should double in size and feel light and airy. Gently poke the surface if it springs back slowly, it’s ready for the next step.
Can I prepare Easy No-Knead Brioche Rolls dough in advance?
Yes! The dough can be refrigerated for up to 3 days after the initial rise. Cold dough is actually easier to shape and develops more complex flavors.
What’s the best way to achieve bakery-quality Easy No-Knead Brioche Rolls at home?
Focus on proper fermentation timing, use room temperature eggs, don’t skip the egg wash, and ensure your oven is fully preheated before baking.
Why are my Easy No-Knead Brioche Rolls dense instead of fluffy?
Dense rolls usually result from insufficient rising time, old yeast, or too much flour added during shaping. Ensure your yeast is fresh and give the dough adequate time to rise.
Conclusion
Easy No-Knead Brioche Rolls That Melt in Your Mouth

These remarkable rolls prove that exceptional bread doesn’t require professional training or expensive equipment. The no-knead method democratizes brioche-making, allowing anyone to create bakery-quality results with patience and simple techniques. From the initial mixing to the final golden-brown perfection, this recipe transforms basic ingredients into something truly special. Whether you’re hosting a dinner party, preparing a special breakfast, or simply wanting to fill your home with the irresistible aroma of fresh bread, these rolls deliver every time. The versatility of the basic recipe means you can customize flavors to suit any occasion or preference.
Made this recipe? Drop your twist in the comments, rate the recipe, and tag us on Facebook, Instagram with #recipehoney.com we might feature your creation!

Easy No-Knead Brioche Rolls That Melt in Your Mouth
Ingredients
Instructions
- Mix Dry Ingredients: Whisk the flour, salt, yeast, and sugar in a large mixing bowl until well combined.
- Prepare Wet Mixture: Mix the cold water and egg in a medium bowl, using a whisk to combine them. Heat the milk and butter in a small saucepan until the butter melts completely. Pour this warm mixture into the cold water and egg mixture, stirring gently to combine.
- Combine and Form Dough: Combine the wet mixture with the flour mixture, using a spatula to mix until a sticky dough forms. Coat the dough lightly with olive oil and rub the oil on the dough’s surface to prevent sticking during rising.
- First Rise: Cover the bowl with plastic wrap or a clean towel, and let the dough rise in a warm area for 2 to 3 hours until it’s doubled in size, or refrigerate it overnight for a slow rise.
- Shape Rolls: Deflate the dough gently on a lightly floured work surface. Turn it out and divide it into 8 to 10 equal portions. Shape each portion into a smooth ball using enough flour to prevent sticking, placing them on a parchment-lined sheet pan.
- Second Rise: Let rise the shaped rolls for about 30-45 minutes until puffed and light.
- Preheat and Prepare: Preheat your oven to 425ºF. Brush the tops of the rolls with the egg wash.
- Bake: Bake for about 15-20 minutes or until golden brown all around.
- Cool and Serve: Cool on a wire rack completely. Optional: Serve warm with a spread of butter.