
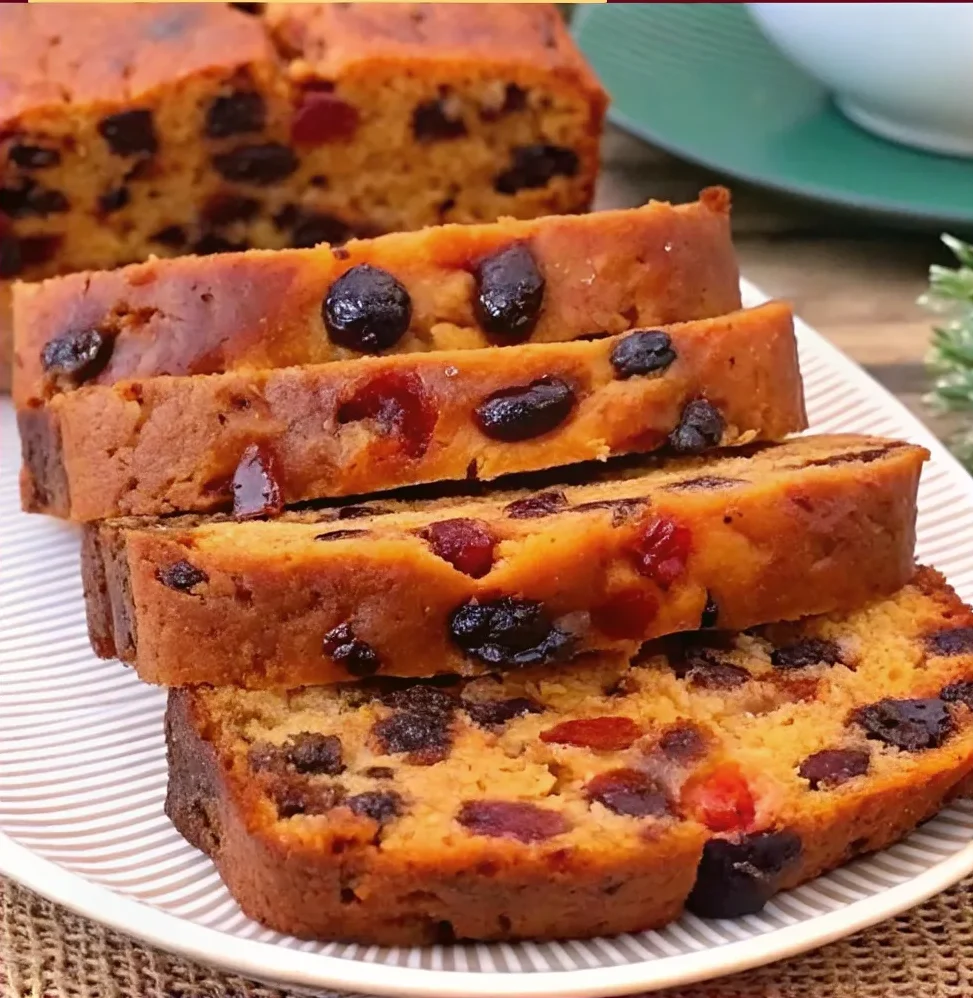
Transform fruit cake skeptics into believers with this time-tested traditional fruit cake recipe that creates incredibly moist, flavorful loaves bursting with premium dried fruits and warm spices. This authentic fruit cake recipe has been passed down through generations, creating the kind of dessert that builds lasting holiday memories and continues the beautiful tradition of classic British dessert traditions.
Most fruit cake recipes result in dry, overly sweet, or artificial-tasting cakes that give this traditional dessert a bad reputation. Many home bakers struggle with dense, crumbly textures or cakes that lack the rich, complex flavors that make fruit cake truly special. The difference lies in proper technique, quality ingredients, and understanding the science behind creating the perfect moisture balance.
Table of Contents
This authentic fruit cake recipe yields two perfect 8×4-inch loaves using professional techniques for soaking, aging, and storing that guarantee exceptional results. Whether you’re preparing gifts for the holiday season or creating a centerpiece dessert for family gatherings, this recipe delivers consistently delicious results that will change minds about this classic treat.
Essential Ingredients for Perfect Traditional Fruit Cake
The foundation of any exceptional fruit cake recipe lies in selecting premium ingredients that work together to create complex flavors and perfect texture. Understanding each component’s role helps ensure your finished cakes achieve that coveted moist, rich consistency that keeps people coming back for more.
Premium Dried Fruit Selection Guide
Quality dried fruits form the heart of your traditional fruit cake. Choose a mixture of golden raisins (2 cups), dark raisins (1 cup), dried cranberries (1 cup), chopped dried apricots (¾ cup), and dried cherries (½ cup). Avoid overly sweetened varieties that can make your cake cloying. For detailed guidance on selecting the best options, refer to this complete guide to selecting quality dried fruits for baking.
Fresh is always better when it comes to dried fruits. Look for plump, slightly soft pieces that aren’t completely desiccated. Hard, crystallized fruits won’t rehydrate properly during the soaking process, leading to tough bits in your finished cake. Store-bought fruit mixes often contain inferior quality fruits, so purchasing individual varieties and creating your own blend yields superior results.
Spice Blend Ratios and Substitutions
The signature warmth in this fruit cake recipe comes from a carefully balanced spice blend: 2 teaspoons ground cinnamon, 1 teaspoon ground nutmeg, ½ teaspoon ground allspice, ½ teaspoon ground cloves, and ¼ teaspoon ground ginger. These measurements create depth without overwhelming the fruit flavors.
For those who prefer milder spicing, reduce the cloves by half and increase the cinnamon slightly. If you’re missing specific spices, substitute pumpkin pie spice (2 teaspoons) for the entire blend, though the flavor won’t be quite as complex. Always use freshly ground spices when possible—pre-ground spices lose potency quickly and won’t provide the same aromatic impact.
Alternative Soaking Liquids
Traditional recipes often call for various soaking liquids, but this version focuses on family-friendly alternatives that create exceptional flavor. Apple juice concentrate mixed with water (1:1 ratio), grape juice, or strong black tea infused with orange peel create rich, complex flavors for soaking your dried fruits. These alternatives provide the same moisture and flavor enhancement without any concerns for family gatherings.
For the deepest flavor development, combine ¾ cup apple juice with ¼ cup orange juice, add 2 tablespoons honey, and warm the mixture before pouring over your fruit blend. This combination mimics the complexity of traditional methods while remaining completely suitable for all family members and dietary preferences.
Step-by-Step Fruit Cake Preparation Method
Success with this fruit cake recipe depends on following the proper sequence and timing for each preparation step. Unlike quick breads or simple cakes, fruit cake requires patience and attention to detail, but the results justify every minute invested in the process.
Day-Before Fruit Soaking Technique
Begin your traditional fruit cake preparation 24 hours before baking by combining all dried fruits in a large mixing bowl. Heat your chosen soaking liquid until just warm (not boiling), then pour over the fruits, ensuring complete coverage. Cover tightly with plastic wrap and let stand at room temperature overnight.
This extended soaking period allows the fruits to fully rehydrate while absorbing the flavors of your soaking liquid. Properly soaked fruits should be plump and tender, with minimal liquid remaining in the bowl. If excess liquid remains after 24 hours, drain it off but reserve it for adding moisture to your batter if needed.
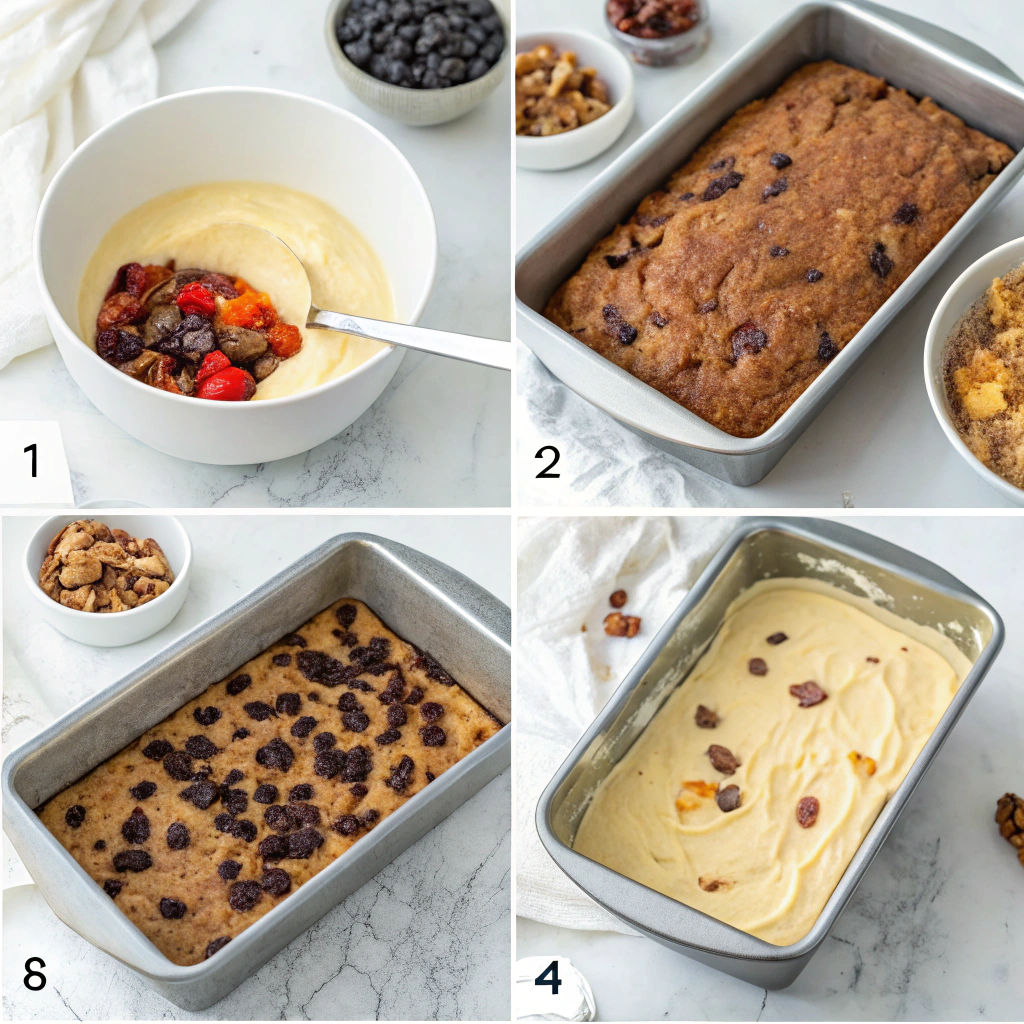
Proper Mixing Order for Best Texture
The mixing sequence in this fruit cake recipe prevents overmixing while ensuring even distribution of ingredients. Start by creaming 1 cup softened butter with ¾ cup brown sugar until light and fluffy (about 4 minutes with an electric mixer). Add 4 large eggs one at a time, beating well after each addition.
In a separate bowl, whisk together 2 cups all-purpose flour, your spice blend, 1 teaspoon baking powder, and ½ teaspoon salt. Add the dry ingredients to the butter mixture in three additions, alternating with ½ cup of your reserved soaking liquid or apple juice. Mix just until combined—overmixing develops gluten and creates tough cake texture.
Finally, fold in your soaked fruit mixture and 1 cup chopped pecans or walnuts using a large spoon or rubber spatula. The batter should be thick and heavily studded with fruits and nuts. If it seems too dry, add reserved soaking liquid one tablespoon at a time until you achieve a dropping consistency.
Batter Distribution and Pan Preparation
Proper pan preparation ensures easy removal and prevents sticking in this dense fruit cake recipe. Grease two 8×4-inch loaf pans thoroughly with butter, then line with parchment paper, leaving overhang for easy lifting. Grease the parchment as well—this double protection is essential for dense fruit cakes.
Divide the batter evenly between prepared pans, using a kitchen scale for accuracy if available. Level the tops gently with an offset spatula, creating a slight depression in the center to promote even rising. Each pan should be about ¾ full—any fuller and the batter may overflow during baking.
Baking Temperature and Timing for Two Perfect Loaves
Achieving the perfect texture in your fruit cake recipe requires precise temperature control and careful timing. Unlike lighter cakes that bake quickly at high temperatures, fruit cakes need slow, gentle heat to cook through without burning the exterior or drying out the interior.
Oven Setup and Temperature Control
Preheat your oven to 275°F (135°C)—significantly lower than most cake recipes. This low temperature allows the dense batter to cook evenly without the exterior browning too quickly. Position racks in the lower third of the oven to prevent over-browning the tops while ensuring thorough cooking.
If your oven runs hot or has hot spots, consider using an oven thermometer to verify accuracy. Place a shallow pan of water on the bottom rack during baking—this creates steam that helps prevent the cake surface from drying out during the long baking time. Having the right equipment is crucial, and you can learn more about essential baking equipment for perfect cake results.
Doneness Testing Methods
This traditional fruit cake typically requires 90-120 minutes of baking time, but several factors affect the exact timing. Begin checking for doneness after 90 minutes using multiple testing methods for accuracy. The tops should be deep golden brown and spring back lightly when touched.
Insert a long skewer or cake tester into the center of each loaf—it should come out with just a few moist crumbs clinging, not wet batter. The internal temperature should reach 200°F (93°C) when measured with an instant-read thermometer. The cakes should also pull slightly away from the pan sides when fully baked.
If the tops brown too quickly before the centers cook through, tent loosely with aluminum foil and continue baking. Don’t rush this process—underbaked fruit cake will be gummy in the center, while overbaked cake becomes dry and crumbly.
Cooling and Removal Techniques
Proper cooling prevents cracking and ensures easy removal from your fruit cake recipe. Cool the pans on wire racks for 15 minutes before attempting removal. The cakes should feel set but still warm when you turn them out.
Use the parchment paper overhang to lift the cakes from the pans, then cool completely on wire racks before wrapping or storing. This complete cooling process takes 2-3 hours but is essential—warm cake will create condensation when wrapped, leading to soggy exteriors and potential spoilage.
Professional Storage and Aging Techniques
The beauty of this fruit cake recipe lies not just in its immediate deliciousness, but in how the flavors develop and improve over time. Proper storage techniques ensure your cakes remain moist and flavorful for weeks, making them perfect for advance preparation or gifting.
Family-Friendly Aging Methods
While traditional aging methods aren’t suitable for all families, this traditional fruit cake develops incredible flavor using alternative techniques. Wrap each completely cooled loaf tightly in plastic wrap, then again in aluminum foil. This double wrapping prevents moisture loss while allowing gradual flavor melding.
For enhanced flavor development, brush the cakes lightly with apple juice or grape juice every few days, rewrapping immediately afterward. This technique mimics traditional aging methods while keeping the recipe family-friendly. The natural sugars in the fruit juices help preserve moisture and add complexity.
Proper Wrapping and Storage Timeline
Store your wrapped fruit cake recipe results in a cool, dark place like a pantry or basement. Ideal storage temperature ranges from 60-70°F (15-21°C). Check the cakes weekly, looking for any signs of moisture loss or unwrapping that needs attention.
For short-term storage (1-2 weeks), room temperature storage works perfectly. For longer storage up to 6 weeks, refrigerate the wrapped cakes. Bring refrigerated cakes to room temperature 2-3 hours before serving to restore optimal texture and allow flavors to fully emerge.
Flavor Development and Peak Timing
This fruit cake recipe reaches peak flavor after 1-2 weeks of storage, when the spices mellow and blend while the fruits distribute their moisture throughout the cake. The texture becomes more tender and cohesive, making slicing easier and more attractive.
For immediate consumption, the cakes are delicious after complete cooling. For gift-giving or special occasions, plan to bake 2-3 weeks in advance. The cakes will maintain peak quality for up to 6 weeks with proper storage, making them ideal for advance holiday preparation.
Serving Suggestions and Presentation Ideas
Presenting your traditional fruit cake beautifully enhances the eating experience and shows respect for the time invested in creating this special dessert. The right serving techniques and accompaniments can elevate this homestyle treat to elegant dessert status.
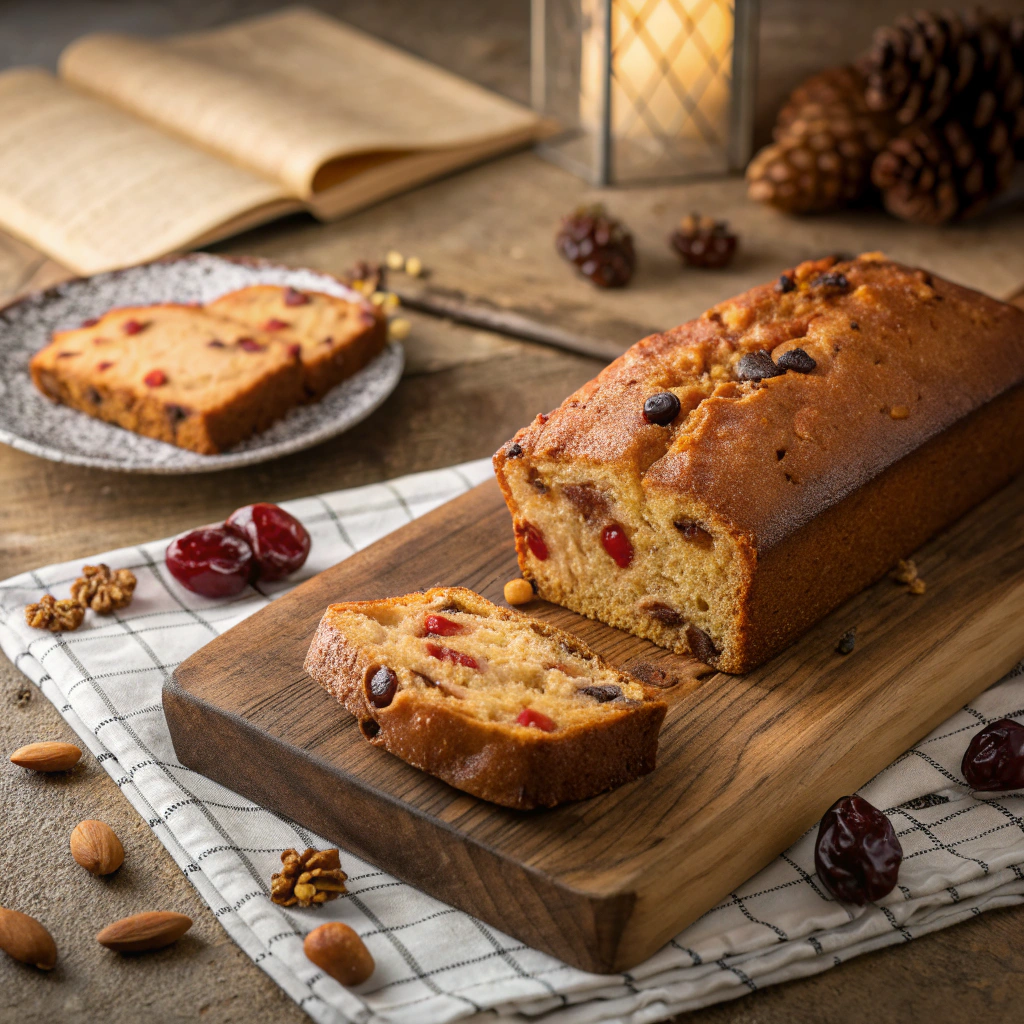
Slicing and Portioning Guidelines
Achieving clean, attractive slices from your fruit cake recipe requires the right technique and tools. Use a sharp, thin-bladed knife and clean the blade between cuts to prevent fruit and nut pieces from dragging. Slice the cake at room temperature for easiest cutting—cold cake tends to crumble.
Cut slices approximately ½ to ¾ inch thick for optimal portion sizes. Thinner slices may break apart due to the fruit and nut content, while thicker slices can be overwhelming due to the rich, dense nature of the cake. Each 8×4-inch loaf should yield 12-14 generous servings.
Garnishing and Glazing Options
Simple garnishes enhance your fruit cake recipe presentation without overwhelming the traditional flavors. A light dusting of powdered sugar creates an elegant, snow-like appearance perfect for holiday presentations. For special occasions, arrange a few pieces of the same dried fruits used in the recipe alongside each slice.
For a glossy finish, brush the top of each loaf with warmed apricot jam or honey thinned with a little apple juice. This creates an attractive sheen while adding a subtle sweetness that complements the spiced fruit flavors. Apply glazes just before serving to maintain the best appearance.
Pairing Recommendations
This rich traditional fruit cake pairs beautifully with hot beverages and light accompaniments. Serve with freshly brewed coffee, black tea, or spiced chai to balance the sweetness. The warm spices in the cake complement similar flavors in spiced teas particularly well.
For special occasions, consider serving small portions with vanilla ice cream or lightly sweetened whipped cream. The cool, creamy textures provide pleasant contrast to the dense, spiced cake. Fresh berries or orange segments also make excellent palate-cleansing accompaniments. You can find more inspiration in our guide to sweet baking techniques and dessert tips.
Gift Preparation and Packaging Guide
One of the greatest joys of this fruit cake recipe is sharing it with others. Properly prepared and packaged fruit cakes make memorable, heartfelt gifts that recipients can enjoy for weeks. The key is planning ahead and presenting your homemade treasures attractively.
Timeline for Gift-Giving
For optimal gift-giving results with your traditional fruit cake, begin planning 3-4 weeks before your intended giving date. Bake the cakes 2-3 weeks early to allow for proper aging and flavor development. This timeline also provides flexibility if you need to adjust your baking schedule.
Plan your final packaging 2-3 days before giving to ensure the presentation looks fresh and appealing. Last-minute packaging often shows, while cakes packaged too far in advance may lose their pristine appearance. Keep wrapped, unpackaged cakes in the refrigerator until final gift preparation.
Professional Wrapping Techniques
Create gift-worthy presentation for your fruit cake recipe results using simple but elegant techniques. Start with clear cellophane wrap or decorative plastic bags designed for food gifts. These materials showcase your beautiful cakes while providing protective barriers.
Place each loaf on a decorative cake board or wrapped cardboard rectangle for stability. Wrap snugly in cellophane, gathering at the bottom and securing with ribbon or decorative twist ties. Add a handwritten label with the cake name, baking date, and basic storage instructions for the recipient.
Storage Instructions for Recipients
Include clear, written storage instructions with your fruit cake recipe gifts to ensure recipients can properly maintain quality. Explain that the cakes improve with age and provide guidelines for optimal storage conditions. Most people aren’t familiar with proper fruit cake care.
Provide simple instructions: “Store in a cool, dry place wrapped in plastic. Cake improves with age and remains fresh for 4-6 weeks. For longer storage, refrigerate and bring to room temperature 2 hours before serving.” These clear directions help ensure your thoughtful gift provides maximum enjoyment.
Frequently Asked Questions
Can I make this traditional fruit cake recipe without using any spirits or wine?
Absolutely! This fruit cake recipe is specifically designed to be family-friendly while maintaining authentic flavors. The soaking liquid alternatives like apple juice concentrate, grape juice, or spiced tea provide excellent flavor development and moisture. These substitutions create complex, rich tastes that rival traditional methods while being suitable for all family members and dietary preferences.
How far in advance should I make fruit cake recipe for optimal flavor?
This fruit cake recipe reaches peak flavor after 1-2 weeks of proper storage. For immediate enjoyment, the cakes are delicious after complete cooling. For gift-giving or special occasions, bake 2-3 weeks in advance. The cakes maintain excellent quality for up to 6 weeks when properly wrapped and stored, making them perfect for advance holiday preparation.
What’s the best way to slice dense fruit cake without crumbling?
Successful slicing of your traditional fruit cake requires a sharp, thin-bladed knife and proper technique. Ensure the cake is at room temperature—cold cake tends to crumble more easily. Clean your knife blade between cuts to prevent dragging fruit and nut pieces. Cut with a gentle sawing motion rather than pressing straight down, and aim for ½ to ¾ inch thick slices for optimal presentation and portion size.
Can I substitute different dried fruits in this fruit cake recipe?
Yes, you can customize this fruit cake recipe while maintaining the overall proportions. Keep the total amount of dried fruit consistent (about 5 cups) but feel free to substitute based on preferences or availability. Dried pineapple, dates, figs, or dried pears work excellently. Avoid fruits with added sulfites or excessive sweetening, as these can affect the final flavor balance and texture.
How do I know when my traditional fruit cake is properly aged and ready to serve?
Your fruit cake recipe results are properly aged when the texture becomes more tender and cohesive, typically after 1-2 weeks of storage. The spices will mellow and blend, creating more complex flavors throughout. The cake should feel slightly softer when gently pressed and slice more cleanly. If you notice any off odors or visible mold, discard the cake—properly stored cakes should smell fragrant and spiced.
What makes this fruit cake recipe more moist than others?
Several techniques in this traditional fruit cake ensure exceptional moisture: the 24-hour fruit soaking process, proper fat-to-flour ratios, low baking temperature, and steam during baking. The extended soaking allows fruits to fully rehydrate, while the gentle baking prevents moisture loss. The combination of butter and fruit juices creates lasting moisture that improves during storage.
This traditional fruit cake recipe creates two perfectly moist loaves with authentic flavor that will convert even the most skeptical dessert lovers. The family-friendly adaptations make it suitable for all celebrations while maintaining the complex, rich taste that makes fruit cake truly special. With proper aging and storage techniques, your homemade fruit cakes become gift-worthy treasures that recipients will appreciate for weeks.
The detailed techniques and troubleshooting guidance ensure your success, whether you’re a novice baker or experienced cook looking to perfect your fruit cake skills. Start this recipe early for upcoming holidays to allow proper aging time—your family and friends will be amazed by the difference proper technique makes. For more inspiration with other traditional family dessert recipes or explore additional professional holiday baking preparation techniques to expand your seasonal baking repertoire.
Print
Grandma’s Traditional Fruit Cake Recipe
- Total Time: 1 day 2 hours
- Yield: 2 loaf cakes (32 servings) 1x
- Diet: Vegetarian
Description
A traditional moist fruit cake made with rum-soaked dried fruit, citrus zest, and candied ginger. This is the best fruit cake recipe you’ll ever make – it turns cynics into converts! The secret lies in soaking mixed dried fruits in dark rum for 24 hours, then aging the finished cakes wrapped in alcohol-soaked cheesecloth for at least a week. This recipe yields two 8×4-inch loaf cakes, perfect for keeping one and gifting another.
Ingredients
- Soaked Fruit Mixture:
- 1¼ cups (200g) dark raisins
- 1¼ cups (200g) golden raisins
- 2 cups (320g) mixed unsweetened dried fruit, chopped (equal parts peaches and apricots work well)
- 1 cup (160g) dried unsweetened black figs, chopped
- 1 cup (160g) dried unsweetened tart cherries, chopped
- ¾ cup (120g) dried unsweetened prunes, chopped
- ¾ cup (180ml) dark rum
- Fruit Cake Batter:
- 1½ cups (180g) unbleached all-purpose flour
- ½ teaspoon baking powder
- 1 teaspoon ground cinnamon
- 1 teaspoon ground ginger
- ¼ teaspoon ground nutmeg
- 1 teaspoon kosher salt
- 1 stick (115g) unsalted butter, softened
- ¾ cup (160g) packed light brown sugar
- 5 large eggs, room temperature
- 1 tablespoon freshly grated lemon zest
- 1 tablespoon freshly grated orange zest
- ½ cup (120ml) freshly squeezed orange juice
- 1 Granny Smith apple, peeled and coarsely grated
- ¾ cup (90g) slivered almonds
- 3 tablespoons (36g) finely diced crystallized ginger
- ⅔ cup (100g) chopped bittersweet chocolate (optional)
- For Storage:
- Medium sherry or triple sec for soaking cheesecloth
- Optional Decorative Glaze:
- ¼ cup (72g) apricot preserves
- ¼ cup (60ml) water
- Whole pecans for garnishing
Instructions
- Soak the Fruit (Day Before): Combine all dried fruit in a large mixing bowl. Add dark rum, cover, and soak at room temperature for minimum 12 hours, ideally 24 hours before baking.
- Prepare for Baking: Preheat oven to 300°F (150°C) with rack in center position. Prepare two 8×4-inch loaf pans (grease and line with parchment if not using nonstick).
- Mix Dry Ingredients: In a medium bowl, whisk together flour, baking powder, cinnamon, ginger, nutmeg, and salt. Set aside.
- Cream Butter and Sugar: In stand mixer with paddle attachment, cream softened butter and brown sugar on medium-high speed for 3 minutes until light and fluffy.
- Add Eggs: Reduce speed to medium and add eggs one at a time, beating just until incorporated. Mixture may look slightly broken – that’s normal.
- Combine Wet and Dry: On low speed, slowly add flour mixture until just absorbed. Remove bowl from mixer.
- Add Remaining Ingredients: Stir in lemon zest, orange zest, orange juice, grated apple, almonds, crystallized ginger, soaked fruit mixture (with any remaining liquid), and chocolate if using. Mix with large spatula until evenly incorporated.
- Bake the Cakes: Divide batter evenly between prepared pans. Smooth tops with offset spatula. Bake 75-90 minutes, rotating pans halfway through, until set and golden brown. Cool completely in pans.
- Age for Best Flavor: Remove cooled cakes from pans. Soak cheesecloth pieces in sherry or triple sec (lightly damp, not soaking). Wrap each cake tightly, then cover with wax paper and foil. Store in refrigerator up to 6-8 weeks, re-soaking cheesecloth weekly.
Notes
Essential Tips: Use only unsweetened dried fruit for best balance. The longer you age the cake (minimum 1 week), the better the flavor develops. Alcohol-Free Option: Substitute orange juice, apple juice, or strong Earl Grey tea for rum, though flavor will be less complex. Storage: Cakes keep 6-8 weeks refrigerated when properly wrapped. Serving: Slice with serrated knife into thin pieces. Serve plain or with salted butter. Glaze Note: Only glaze cakes you plan to serve immediately, not those being aged. Equipment: Recipe tested with 8×4-inch loaf pans but readers report success with bundt pans (adjust baking time accordingly).
- Prep Time: 1 day
- Cook Time: 1 hour 30 minutes
- Category: Dessert
- Method: Baking
- Cuisine: Traditional
Nutrition
- Serving Size: 1 serving (1/32nd of recipe)
- Calories: 196
- Sugar: 26g
- Sodium: 58mg
- Fat: 5g
- Saturated Fat: 2g
- Unsaturated Fat: 2g
- Trans Fat: 0g
- Carbohydrates: 36g
- Fiber: 2g
- Protein: 3g
- Cholesterol: 30mg