
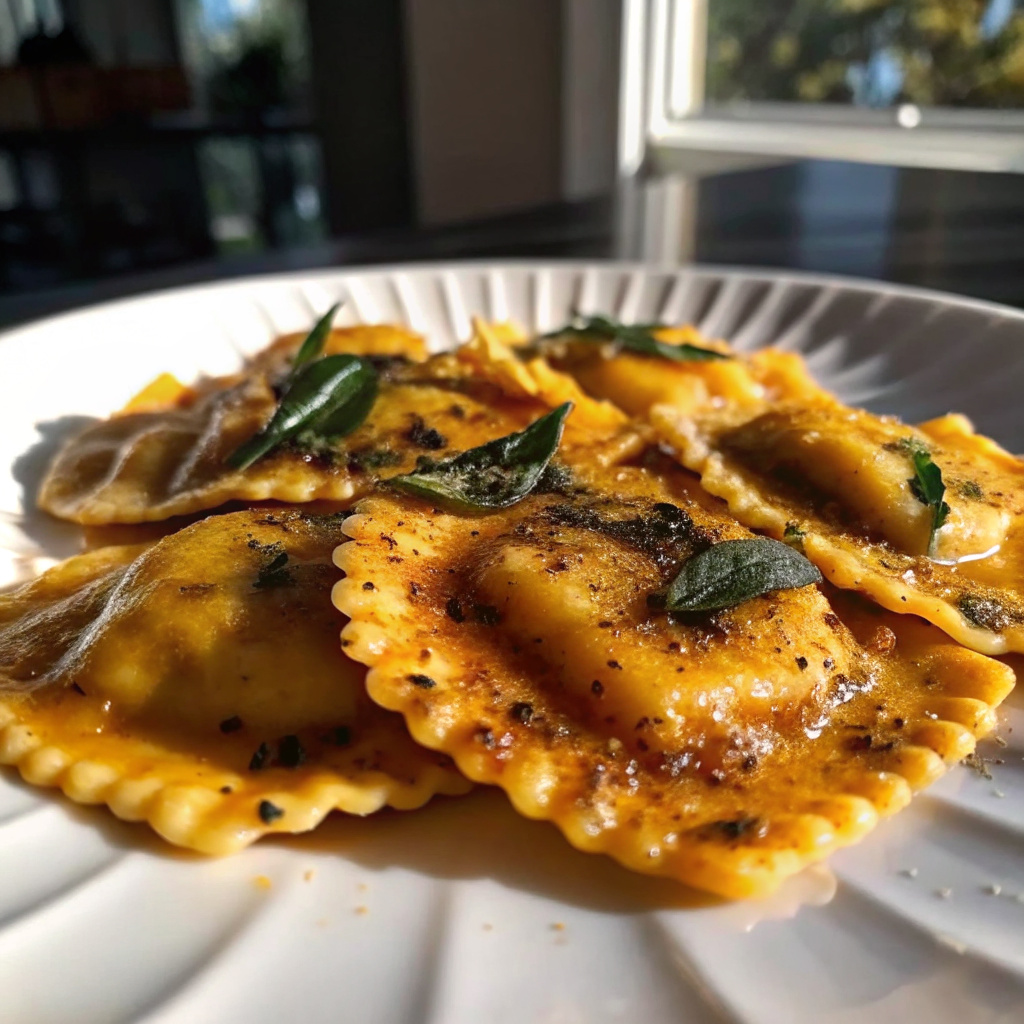
Transform your kitchen into an Italian trattoria with this authentic homemade pumpkin ravioli recipe that rivals any restaurant dish. As autumn leaves begin to fall, there’s nothing quite like the warm, comforting flavors of fresh pumpkin ravioli paired with rich garlic brown butter sauce. Store-bought ravioli simply cannot compare to the delicate texture and vibrant taste of handmade pasta filled with perfectly seasoned pumpkin and cheese mixture.
Creating homemade pumpkin ravioli may seem intimidating, but with the right techniques and guidance, anyone can master this elegant Italian classic. This comprehensive guide will walk you through every step of the process, from preparing silky pasta dough to crafting the perfect filling and achieving that golden garlic brown butter sauce that makes this dish truly spectacular.
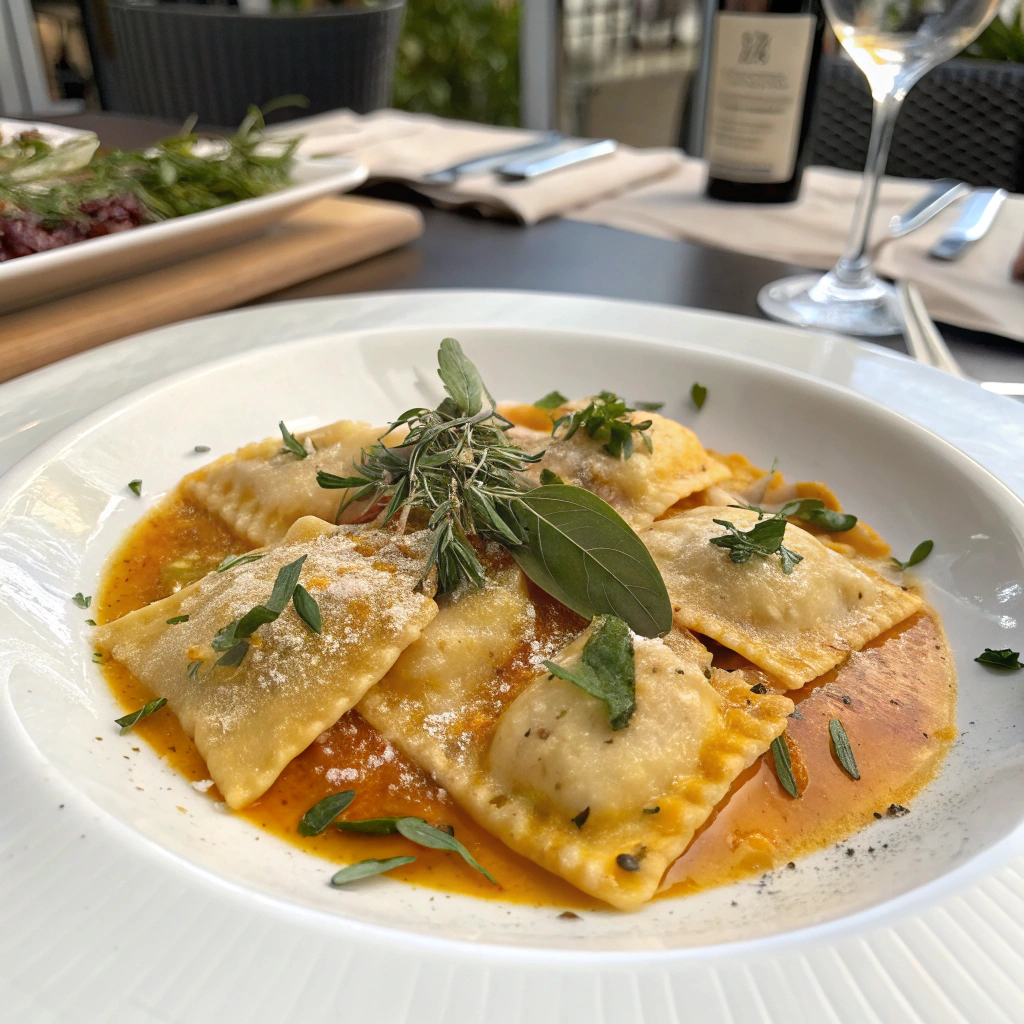
Whether you’re hosting a special dinner party or simply want to elevate your weeknight meal, this homemade pumpkin ravioli recipe delivers restaurant-quality results in your own kitchen. You’ll learn professional techniques, troubleshooting tips, and make-ahead strategies that ensure perfect results every time.
Table of Contents
Essential Ingredients for Perfect Pumpkin Ravioli
The foundation of exceptional homemade pumpkin ravioli lies in selecting premium ingredients that work harmoniously together. Each component plays a crucial role in creating the perfect balance of flavors and textures that make this dish memorable.
Choosing the Right Flour for Pasta Dough
For authentic Italian pasta dough, use “00” flour (doppio zero) or all-purpose flour with a protein content between 10-12%. The “00” flour creates silkier, more pliable dough that’s easier to roll thin without tearing. If unavailable, high-quality all-purpose flour works excellently. Avoid bread flour, as its high protein content makes the dough too elastic and difficult to work with.
Fresh vs. Canned Pumpkin: What Works Best
Both fresh and canned pumpkin work beautifully in ravioli filling, each offering distinct advantages. Fresh pumpkin provides superior flavor control and texture customization. Choose sugar pumpkins or pie pumpkins for the best taste and consistency. Preparing Fresh Pumpkins requires roasting until tender, then draining excess moisture to prevent soggy filling.
High-quality canned pumpkin puree offers convenience and consistent results. Select pure pumpkin puree without added spices or sugar. The key is removing excess moisture by spreading the puree on paper towels for 15-20 minutes before mixing with other filling ingredients.
Cheese Selection for Optimal Flavor Balance
The cheese mixture forms the creamy backbone of your pumpkin ravioli filling. Whole milk ricotta cheese provides the perfect base, offering mild flavor and smooth texture. Look for high-quality ricotta with minimal liquid separation. Complement the ricotta with freshly grated Parmigiano-Reggiano cheese for nutty depth and Pecorino Romano for subtle sharpness.
For enhanced richness, add a small amount of mascarpone cheese. This creates luxurious texture while maintaining the delicate pumpkin flavor as the star of your homemade pumpkin ravioli.
Mastering Homemade Pasta Dough from Scratch
Creating perfect pasta dough is an art that requires understanding the relationship between flour, eggs, and technique. The quality of your dough directly impacts the final texture and taste of your homemade pumpkin ravioli.
Creating the Perfect Flour Well
Begin by measuring 400g (about 3 cups) of “00” flour onto a clean work surface. Create a wide well in the center, ensuring the walls are thick enough to contain the eggs without breaking through. Crack 4 large eggs into the well, adding 2 tablespoons of extra virgin olive oil and a pinch of salt.
Using a fork, gently beat the eggs while gradually incorporating flour from the inner walls of the well. This gradual mixing prevents the eggs from escaping and creates a more uniform dough texture. Continue until the mixture becomes too thick for the fork, then switch to your hands.
Kneading Techniques for Smooth Texture
Proper kneading develops the gluten structure essential for elastic, workable pasta dough. Knead the dough by pushing it away from you with the heel of your palm, folding it back over itself, and rotating it 90 degrees. Repeat this process for 8-10 minutes until the dough becomes smooth, elastic, and slightly glossy.
The finished dough should feel silky and spring back when poked gently. For detailed techniques on achieving perfect elasticity, refer to Pasta Dough Elasticity Techniques which provides professional insights into dough development.
Troubleshooting Common Dough Problems
If your dough feels too dry and cracks during kneading, lightly dampen your hands with water and continue kneading. Never add water directly to the dough, as this creates uneven texture. For overly sticky dough, dust your work surface with flour sparingly, as too much additional flour makes the dough tough.
Wrap the finished dough tightly in plastic wrap and rest for at least 30 minutes at room temperature. This resting period allows the gluten to relax, making the dough easier to roll thin for your homemade pumpkin ravioli.
Crafting the Perfect Pumpkin and Cheese Filling
The filling is the heart of exceptional pumpkin ravioli, requiring careful balance of flavors, textures, and moisture content. A well-crafted filling enhances the delicate pasta without overwhelming it.
Balancing Pumpkin and Cheese Ratios
The ideal ratio combines 1½ cups of prepared pumpkin puree with 1 cup of whole milk ricotta cheese, ½ cup freshly grated Parmigiano-Reggiano, and 2 tablespoons of mascarpone. This proportion ensures the pumpkin flavor shines while the cheeses provide creamy richness and structural integrity.
Mix the ingredients gently in a large bowl, avoiding overmixing which can make the filling dense. The mixture should hold together when spooned but remain light and airy in texture.
Seasoning for Maximum Flavor Impact
Proper seasoning elevates pumpkin ravioli from good to extraordinary. Add ¼ teaspoon freshly grated nutmeg, ½ teaspoon ground cinnamon, ¼ teaspoon white pepper, and 1 teaspoon salt. Fresh herbs like sage or thyme complement the autumn flavors beautifully.
Taste and adjust seasonings carefully, remembering that the flavors will concentrate slightly during cooking. The filling should taste vibrant and well-balanced when eaten alone, as it will be the star of your finished homemade pumpkin ravioli.
Consistency Tips to Prevent Soggy Ravioli
Moisture control is crucial for successful ravioli that won’t burst during cooking. If using fresh pumpkin, ensure it’s completely cooled and well-drained after roasting. Canned pumpkin should be spread on paper towels to remove excess moisture before mixing.
The finished filling should hold its shape when spooned but not be so thick that it’s difficult to seal the pasta edges. If the mixture seems too wet, add freshly grated Parmigiano-Reggiano one tablespoon at a time until you achieve the proper consistency.
Assembly Techniques for Restaurant-Quality Ravioli
Assembling ravioli requires patience and technique, but the results are worth the effort. Proper assembly ensures your homemade pumpkin ravioli look professional and cook evenly without bursting.
Proper Filling Portioning
Consistency in portion size ensures even cooking and professional appearance. Use a small cookie scoop or tablespoon to measure approximately 1½ teaspoons of filling per ravioli. This amount provides adequate filling without overstuffing, which can cause the pasta to burst during cooking.
Place filling portions on one pasta sheet, spacing them about 2 inches apart to allow room for sealing. Work quickly but carefully, as the pasta dough can dry out if left uncovered too long.
Sealing Methods to Prevent Bursting
Effective sealing is crucial for intact ravioli. Lightly brush the pasta around each filling mound with water using a pastry brush. This moisture helps create a strong seal without making the pasta soggy. Place the second pasta sheet over the filling, gently pressing around each mound to remove air bubbles.
Use a ravioli cutter or sharp knife to cut between the filling mounds, leaving about ½ inch border around each piece. Press the edges firmly with a fork or your fingers to create a decorative seal that prevents the filling from escaping during cooking.
Shaping for Professional Presentation
For consistent, professional-looking ravioli, use a ravioli stamp or round cookie cutter to create uniform shapes. Square ravioli are equally elegant and easier to cut with a knife. Ensure all edges are well-sealed and free from air pockets.
Place finished ravioli on a floured baking sheet, making sure they don’t touch each other. If you’re looking for more Perfect Pasta Shaping Techniques, this comprehensive guide offers additional methods for creating beautiful pasta shapes.
Creating the Perfect Garlic Brown Butter Sauce
The garlic brown butter sauce complements pumpkin ravioli perfectly, providing rich, nutty flavors that enhance rather than mask the delicate filling. Mastering this classic sauce elevates your homemade pumpkin ravioli to restaurant quality.
Achieving the Ideal Brown Butter Color
Start with high-quality unsalted butter in a light-colored pan so you can monitor the color changes. Melt 6 tablespoons of butter over medium heat, stirring constantly. The butter will foam, bubble, and gradually turn from yellow to golden to light brown.
Watch for the characteristic nutty aroma and golden-brown color of the milk solids. This process takes 3-5 minutes and requires constant attention. For detailed guidance, Mastering Brown Butter provides expert techniques for perfect results every time.
Garlic Timing for Optimal Flavor
Add 3 thinly sliced garlic cloves to the brown butter just as it reaches the perfect color. The residual heat cooks the garlic gently, preventing burning while developing sweet, nutty flavors. Cook for 30-60 seconds until the garlic becomes fragrant and lightly golden.
Remove the pan from heat immediately to prevent the garlic from becoming bitter. The sauce should smell intensely nutty and aromatic, with no harsh or burnt notes.
Alternative Sauce Variations
While garlic brown butter is classic, several variations complement pumpkin ravioli beautifully. Try adding fresh sage leaves to the brown butter for an herbaceous note, or incorporate toasted pine nuts for extra texture and richness.
For a lighter option, finish the sauce with a splash of vegetable broth and fresh lemon juice. This creates a silky, emulsified sauce that coats the ravioli without overwhelming the delicate pumpkin flavors.
Cooking and Serving Your Homemade Pumpkin Ravioli
Proper cooking technique ensures your carefully crafted ravioli maintain their integrity while achieving perfect texture. The final presentation showcases your culinary skills and makes the dish as visually appealing as it is delicious.
Water Temperature and Salting Guidelines
Bring a large pot of water to a gentle boil and add salt generously – the water should taste like mild seawater. Use about 1 tablespoon of salt per quart of water. The large volume of water helps maintain consistent temperature when you add the ravioli.
Reduce heat to maintain a gentle simmer rather than a rolling boil, which can cause delicate ravioli to burst from agitation. The water should bubble gently around the edges of the pot.
Timing for Perfect Al Dente Texture
Fresh homemade pumpkin ravioli cook much faster than dried pasta. Gently add ravioli to the simmering water in small batches to avoid overcrowding. They typically need 3-4 minutes for fresh pasta, or until they float to the surface.
Test one ravioli by cutting it open – the pasta should be tender but still have slight bite, and the filling should be heated through. Remove ravioli with a slotted spoon to preserve their delicate shape.
Plating and Garnishing Like a Professional
Warm your serving plates in a low oven before plating. Arrange 4-5 ravioli per serving on each plate, drizzling the garlic brown butter sauce over and around them. Garnish with freshly grated Parmigiano-Reggiano, crispy sage leaves, and a light sprinkle of freshly cracked black pepper.
For an elegant touch, add a few toasted pine nuts or pumpkin seeds for textural contrast. The plating should be simple and clean, allowing the beautiful ravioli to be the focal point of the presentation.
Storage, Make-Ahead Tips, and Recipe Variations
Understanding proper storage techniques and make-ahead strategies makes homemade pumpkin ravioli accessible for entertaining and meal planning. These tips ensure you can enjoy fresh pasta whenever the craving strikes.
Freezing Techniques for Future Meals
Fresh ravioli freeze exceptionally well when properly prepared. Arrange assembled ravioli on a parchment-lined baking sheet, ensuring they don’t touch. Freeze for 2-3 hours until solid, then transfer to freezer bags or containers.
Properly frozen homemade pumpkin ravioli maintain quality for up to 3 months. Cook directly from frozen, adding 1-2 extra minutes to the cooking time. Never thaw frozen ravioli before cooking, as this makes them soggy and prone to breaking.
Make-Ahead Strategies
Prepare components separately for maximum flexibility. Pasta dough can be made up to 2 days ahead and refrigerated, wrapped tightly in plastic. The filling improves in flavor when made a day in advance, allowing the seasonings to meld together.
Assembled ravioli can be refrigerated for up to 24 hours on a floured baking sheet, covered with plastic wrap. For longer storage, freezing is the better option to maintain texture and prevent the pasta from becoming soggy.
Seasonal and Dietary Variations
Adapt this recipe throughout the year by substituting different seasonal squashes like butternut or delicata. Each variety brings unique flavors while maintaining the essential technique for successful homemade pumpkin ravioli.
For dietary modifications, use gluten-free flour blends for the pasta dough, though the texture will differ slightly from traditional wheat pasta. Vegan versions can substitute cashew cheese for ricotta and use aquafaba in place of eggs in the dough.
Consider serving alongside dishes from your collection of Complementary Sides for Pasta to create a complete autumn feast that showcases seasonal flavors beautifully.
Frequently Asked Questions
How long does homemade pumpkin ravioli take to cook?
Fresh homemade pumpkin ravioli typically cook in 3-4 minutes in gently simmering salted water. You’ll know they’re done when they float to the surface and the pasta feels tender when tested. Frozen ravioli need 5-6 minutes total cooking time. Always taste-test one ravioli to ensure the pasta has the proper al dente texture and the filling is heated through completely.
Can I make pumpkin ravioli ahead of time?
Yes, homemade pumpkin ravioli are excellent for make-ahead preparation. You can assemble them up to 24 hours in advance and refrigerate on a floured baking sheet. For longer storage, freeze assembled ravioli for up to 3 months. The pasta dough can be made 2 days ahead and refrigerated, while the filling actually improves in flavor when made a day in advance.
What’s the best way to prevent pumpkin ravioli from bursting?
Prevent bursting by controlling moisture in the filling, using proper sealing techniques, and gentle cooking methods. Drain excess moisture from pumpkin puree before mixing the filling. Seal edges firmly with slightly damp fingers, removing all air bubbles. Cook in gently simmering (not rapidly boiling) water, and avoid overcrowding the pot to prevent ravioli from bumping into each other.
Can I substitute ingredients in homemade pumpkin ravioli?
Many substitutions work well in this recipe. For the pasta dough, gluten-free flour blends can replace regular flour, though texture will differ. In the filling, butternut squash or sweet potato can substitute for pumpkin. Replace ricotta with well-drained cottage cheese or cashew cheese for vegan options. Mascarpone can be substituted with cream cheese, and different hard cheeses like aged Gouda can replace Parmigiano-Reggiano for varied flavor profiles.
Why is my pasta dough too sticky or too dry?
Dough consistency issues usually stem from environmental factors and ingredient variations. Sticky dough often results from humid conditions or eggs that are larger than average. Fix by dusting work surface lightly with flour and kneading briefly. Dry, cracking dough indicates insufficient moisture – lightly dampen your hands and continue kneading rather than adding water directly. Temperature and humidity affect flour absorption, so adjust gradually during the kneading process.
Conclusion
Creating homemade pumpkin ravioli transforms a simple autumn ingredient into an elegant, restaurant-quality meal that showcases your culinary skills. This comprehensive guide provides all the techniques, tips, and troubleshooting advice needed to master every component, from silky pasta dough to perfectly seasoned filling and aromatic garlic brown butter sauce.
The time and effort invested in making fresh pasta pays dividends in flavor, texture, and satisfaction. Your homemade pumpkin ravioli will feature delicate pasta that melts on the tongue, rich and creamy filling that celebrates the season, and a sauce that enhances rather than overwhelms these carefully balanced flavors.
Whether you’re preparing an intimate dinner for two or hosting a larger gathering, this recipe provides the foundation for memorable meals. The make-ahead options and storage techniques ensure you can enjoy fresh pasta whenever desired, while the variation suggestions keep the recipe exciting throughout the autumn season.
Start your pasta-making journey today, and don’t forget to explore more Fall Dinner Inspiration to create complete seasonal menus that celebrate the best flavors of autumn. Your kitchen will fill with the aromas of Italy, and your guests will be amazed by the professional quality of your homemade pumpkin ravioli.

Homemade Pumpkin Ravioli with Garlic Brown Butter Recipe
- Total Time: 1 hour 15 minutes
- Yield: 4 servings 1x
- Diet: Vegetarian
Description
This restaurant-quality Homemade Pumpkin Ravioli with Garlic Brown Butter combines the earthy sweetness of pumpkin with rich, nutty brown butter for an elegant autumn meal. The silky homemade pasta wraps a creamy pumpkin filling made with ricotta, parmesan, and warm spices, while the garlic brown butter sauce adds sophisticated depth and aroma. Though it requires intermediate pasta-making skills, this impressive dish delivers professional results that make it perfect for special occasions or when you want to create something truly memorable for dinner guests.
Ingredients
- For the Pasta Dough:
- 1 cup (125g) all-purpose flour
- 1 teaspoon kosher salt
- 1 large egg, room temperature
- 2 large egg yolks, room temperature
- ½ teaspoon olive oil
- Water in spray bottle
- For the Pumpkin Filling:
- ½ cup (123g) ricotta cheese
- ¼ cup (28g) mozzarella cheese, grated
- ¼ cup (25g) parmesan cheese, grated (plus more for garnish)
- 1 cup (245g) pure pumpkin puree
- 1 teaspoon garlic, minced
- ½ teaspoon kosher salt
- ¼ teaspoon black pepper
- ¼ teaspoon nutmeg
- For the Garlic Brown Butter Sauce:
- ⅓ cup unsalted butter
- ½ teaspoon garlic, minced
- 1 teaspoon kosher salt
- ¼ teaspoon black pepper
- ¼ teaspoon fresh sage, finely diced
Instructions
- Make Pasta Dough: Sift flour and salt onto clean work surface, creating wide well in center. Crack egg into well, add yolks and olive oil. Whisk wet ingredients, then slowly fold in flour until too stiff for fork. Use bench scraper and hands to bring mixture together.
- Knead and Rest: Knead dough 7-10 minutes until smooth and elastic, adding flour as needed to prevent sticking. Form into ball, cover with damp towel, and rest 30 minutes at room temperature.
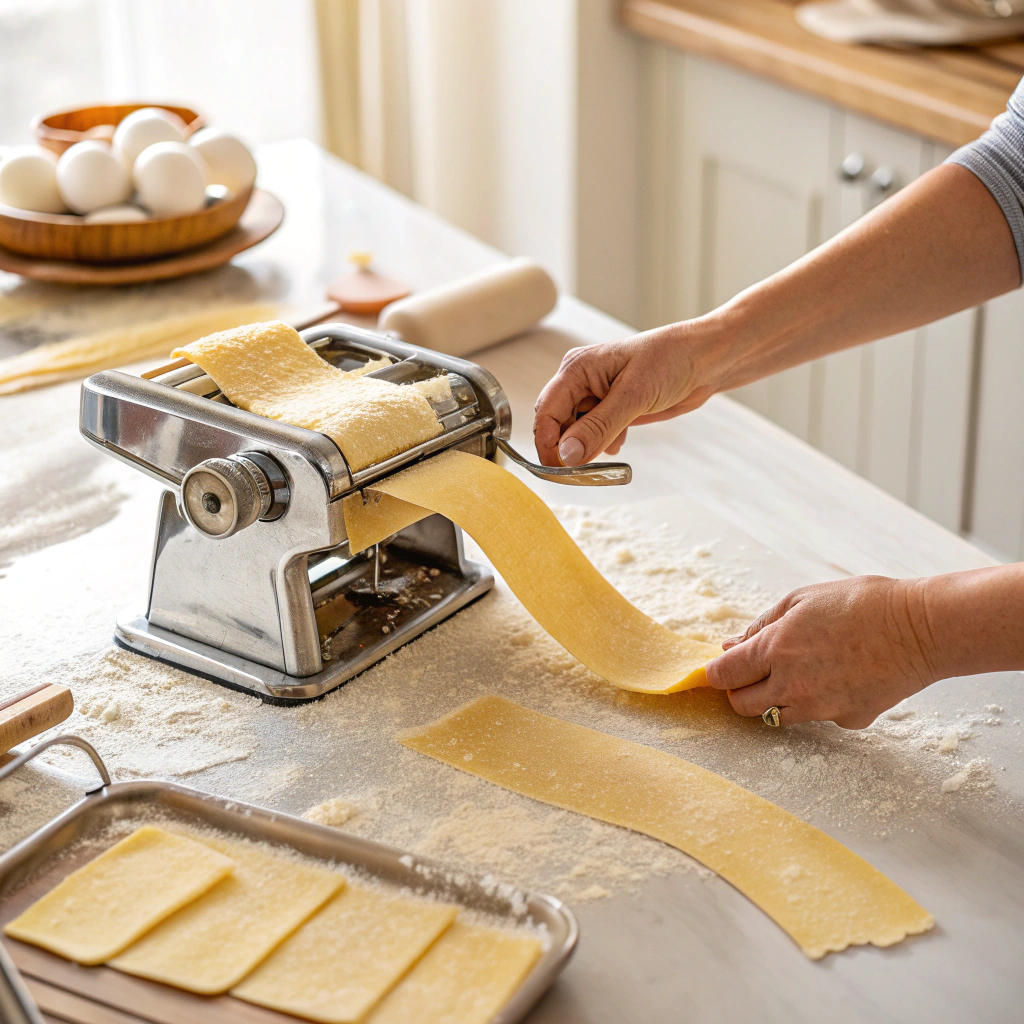
- Roll Pasta: Roll dough into ¼-inch thick rectangle. Using pasta machine, pass through widest setting, then progressively smaller settings until thin enough to be partially see-through but not tearable. Cut into 24-inch sections.
- Prepare Filling: In medium bowl, combine ricotta, mozzarella, parmesan, pumpkin puree, minced garlic, salt, pepper, and nutmeg. Stir until smooth and well incorporated.
- Make Brown Butter: In medium saucepan, melt butter over medium heat. Add garlic and cook 1 minute. Continue cooking until butter turns golden brown with nutty aroma, 2-3 minutes more. Add salt, pepper, and sage. Remove from heat.
- Assemble Ravioli: Lay pasta sheets on floured surface and spray lightly with water. Spoon 2 teaspoons filling onto sheet, leaving 1 inch between portions. Fold top edge over filling, press out air pockets, and seal edges firmly.
- Cut and Cook: Using fluted pastry wheel, trim edges and cut between portions to create individual ravioli. Boil in large pot of salted water 3-4 minutes until they float to surface.
- Serve: Using slotted spoon, transfer cooked ravioli to plates. Drizzle with warm garlic brown butter sauce and top with extra parmesan and fresh parsley. Serve immediately.
Notes
Pasta Tips: Ensure eggs are room temperature for better incorporation. Don’t add too much flour – dough should be slightly tacky. If dough tears during rolling, it may be too thin or need more resting time.
Filling Tips: Use thick pumpkin puree to prevent soggy ravioli. Taste filling and adjust seasonings before assembling. Don’t overfill as ravioli may burst during cooking.
Cooking Success: Salt pasta water generously (should taste like seawater). Don’t overcrowd pot when cooking. Fresh ravioli cook much faster than dried pasta.
Make-Ahead: Pasta dough can be made 1 day ahead and refrigerated. Filling keeps 2 days. Uncooked assembled ravioli freeze beautifully for up to 3 months.
Equipment: Pasta machine recommended but rolling pin works. Bench scraper and fluted pastry wheel helpful but not essential.
- Prep Time: 30 minutes
- Cook Time: 15 minutes
- Category: Main Dish
- Method: Pasta Making
- Cuisine: Italian
Nutrition
- Serving Size: 1 serving (1/4th of recipe)
- Calories: 764
- Sugar: 8g
- Sodium: 1250mg
- Fat: 35g
- Saturated Fat: 20g
- Unsaturated Fat: 12g
- Trans Fat: 0g
- Carbohydrates: 85g
- Fiber: 6g
- Protein: 28g
- Cholesterol: 185mg