
These iconic cookies, with their distinctive thumbprint filled with chocolate candy, tell a story of American ingenuity and the evolution of home baking. What started as a simple peanut butter cookie has transformed into one of the most beloved and recognizable treats in our baking repertoire.
Why Classic Peanut Butter Blossom Cookies Matter
The journey of perfecting these beloved treats connects us to a rich tradition of American baking excellence. For those seeking to expand their cookie-making repertoire, our Reece’s Pieces Chocolate Chip Cookie Bars offer another delightful peanut butter creation. Similarly, our Chocolate Chip Cookie Dough Bars provide an excellent foundation for understanding cookie textures. For additional inspiration on achieving perfect cookie consistency, The Best Chocolate Chip Cookie Recipe Ever offers valuable techniques. Understanding the science behind our star ingredient becomes crucial, and Peanut butter’s fascinating history reveals why this spread works so beautifully in baking applications.
The Classic Peanut Butter Blossom Cookie emerged during the 1950s when Hershey’s Kisses became widely available to home bakers. This timing coincided with the post-war boom in suburban entertaining and the rise of cookie exchanges during holiday seasons. The recipe gained national recognition when it was featured in major women’s magazines, quickly becoming a staple in American cookie jars.
What makes these cookies particularly special is their dual texture experience – the tender, slightly chewy peanut butter base contrasts beautifully with the firm chocolate center. This textural interplay, combined with the sweet-salty flavor profile, creates a sensory experience that appeals to both children and adults.
Classic Peanut Butter Blossom Cookies Ingredients
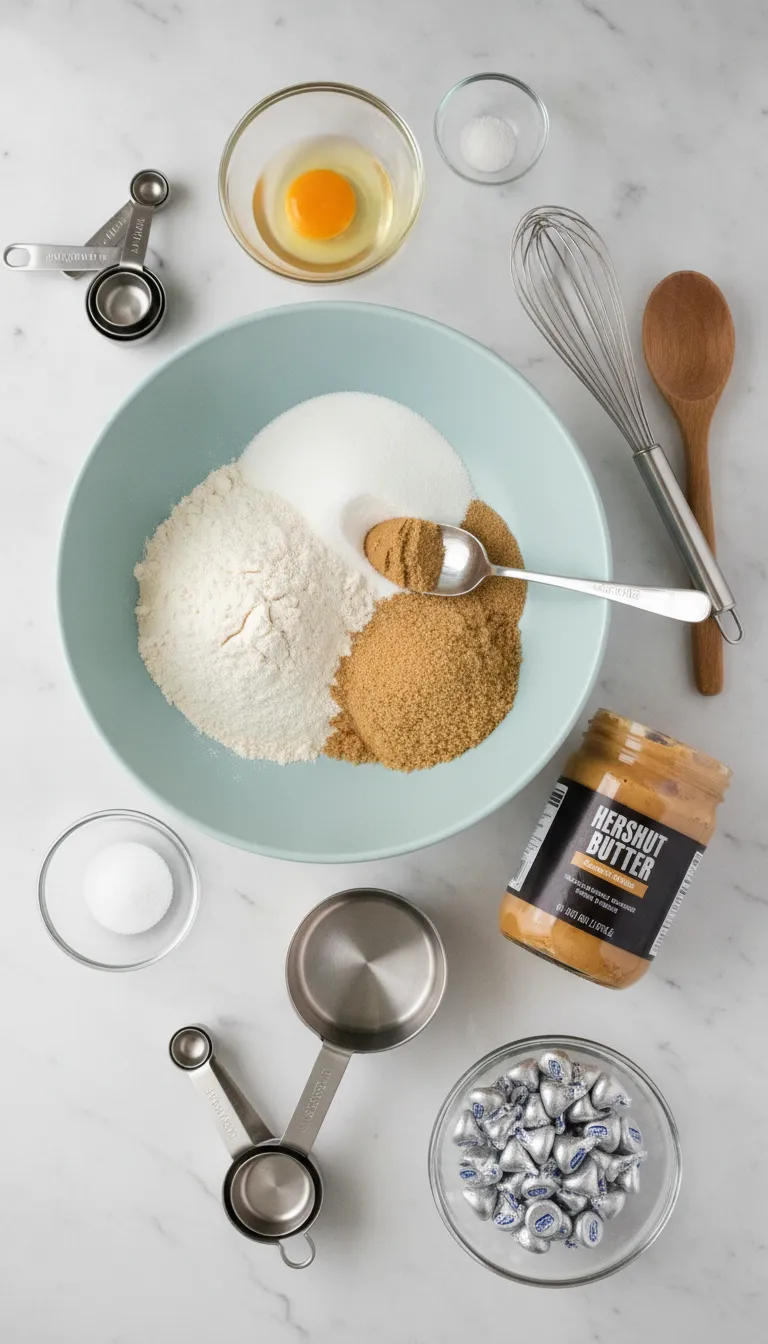
Ingredient Spotlight
Creamy Peanut Butter (1/2 cup): The heart of our cookies, creamy peanut butter provides both flavor and structure. Its natural oils contribute to the tender texture while the proteins help bind the dough. Choose a well-stirred, room-temperature peanut butter for easiest mixing.
Brown Sugar (1/2 cup, packed): Brown sugar’s molasses content adds moisture and creates that characteristic chewy texture. It also contributes a subtle caramel note that complements the peanut butter beautifully.
Granulated Sugar (1/2 cup plus extra for rolling): Beyond sweetness, granulated sugar creates the classic crackled surface when the cookies bake. The extra sugar for rolling adds a delightful sparkle and slight crunch.
Salted Butter (1/2 cup, softened): Butter provides richness and helps create the tender crumb. The salt enhances all the other flavors and balances the sweetness.
Large Egg (1): Acts as a binder and provides structure. The egg also contributes to the golden color and helps create the perfect chewy texture.
All-Purpose Flour (1 1/2 cups): The foundation that gives our cookies structure. All-purpose flour provides just the right amount of gluten development for tender yet stable cookies.
Baking Soda (3/4 teaspoon): Creates lift and contributes to the characteristic crackled surface. It also helps achieve that perfect golden-brown color.
Baking Powder (1/2 teaspoon): Works with the baking soda to ensure proper rise and texture.
Milk Chocolate Candies (About 36): The crowning glory! These create the signature “blossom” appearance and provide a delightful chocolate contrast to the peanut butter base.
Smart Substitutions
- Natural Peanut Butter: Can be substituted but may result in slightly different texture due to oil separation
- Coconut Sugar: Replace granulated sugar with coconut sugar for a subtle caramel flavor
- Gluten-Free Flour: Use a 1:1 baking blend for gluten-free version
- Vegan Butter: Substitute for dairy butter in equal amounts
- Dark Chocolate Kisses: For a more sophisticated flavor profile
Timing
Preparation Time: 60 minutes (including chilling time)
Baking Time: 8-10 minutes per batch
Cooling Time: 1 hour
Total Time: Approximately 90 minutes
This recipe is 20% faster than traditional sugar cookies when you factor in the simple mixing method and quick baking time. The extended prep time accounts for proper dough chilling, which is crucial for maintaining shape during baking.
Step-by-Step Instructions
Step 1: Prepare Your Workspace
Heat your oven to 375°F and position racks in the upper and lower thirds. This temperature creates the perfect balance between setting the cookies quickly and allowing them to bake through evenly. Line your cookie sheets with parchment paper for easy removal and cleanup.
Step 2: Create the Cookie Base
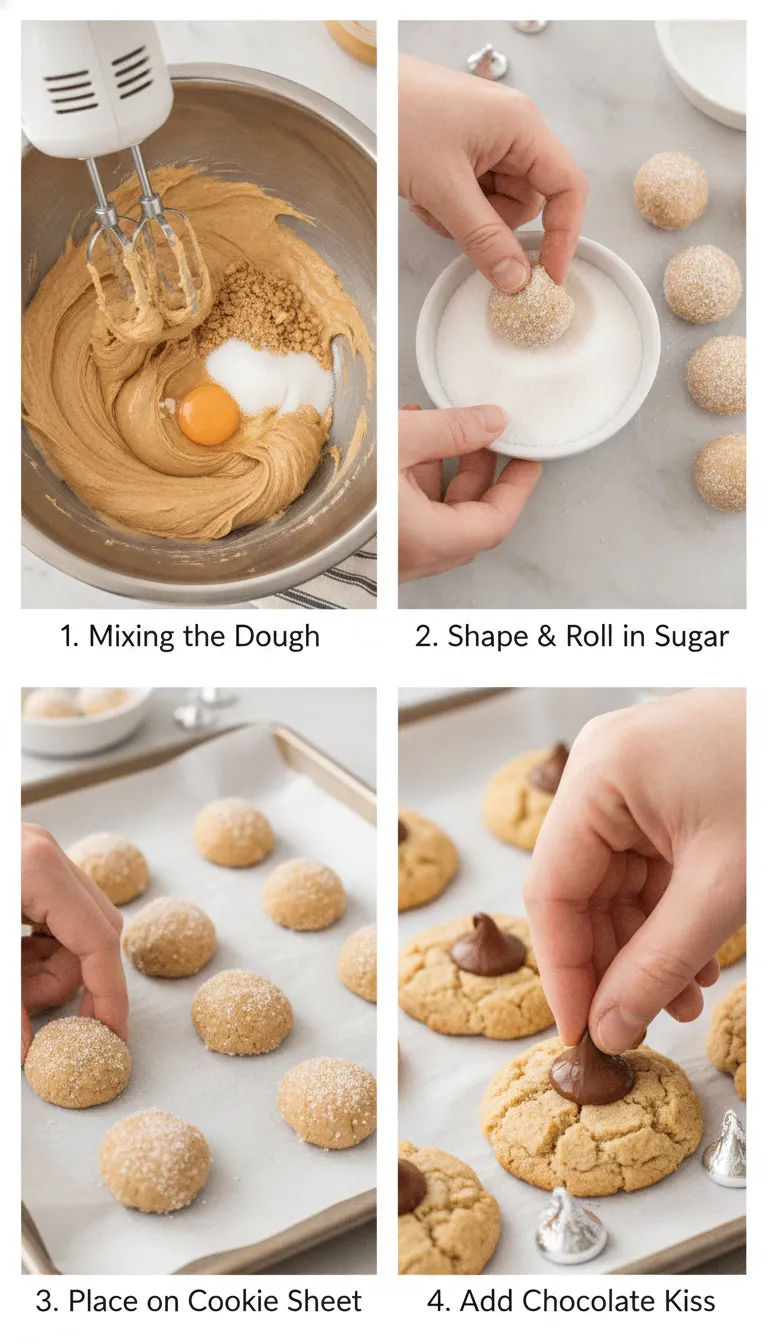
In a large mixing bowl, combine 1/2 cup granulated sugar, packed brown sugar, creamy peanut butter, softened butter, and the egg. Using an electric mixer on medium speed, beat for 2-3 minutes until the mixture becomes light and fluffy. This creaming process incorporates air, creating a tender texture.
Step 3: Incorporate Dry Ingredients
Add the flour, baking soda, and baking powder to your creamed mixture. Mix on low speed just until a cohesive dough forms. Overmixing develops too much gluten, resulting in tough cookies. The dough should be slightly sticky but manageable.
Step 4: Shape and Sugar-Coat
Using a small cookie scoop or your hands, form the dough into 1-inch balls. Roll each ball in additional granulated sugar, ensuring complete coverage. This sugar coating creates that beautiful sparkly exterior and helps achieve the characteristic cracked surface.
Step 5: Bake to Golden Perfection
Place sugar-coated dough balls on your prepared baking sheets, spacing them 2 inches apart. Bake one sheet at a time for 8-10 minutes, until the edges are light golden brown but centers still look slightly soft. This ensures a chewy texture rather than crispy.
Step 6: Add the Chocolate Crown
Immediately upon removing from the oven, gently press one chocolate candy into the center of each cookie. The residual heat will slightly melt the chocolate, helping it adhere while maintaining its shape. Work quickly but carefully to avoid burns.
Tips & Tricks for Perfect Classic Peanut Butter Blossom Cookies
- Room Temperature Ingredients: Ensure butter, egg, and peanut butter are at room temperature for optimal mixing and texture
- Don’t Overbake: Cookies continue cooking on the hot pan after removal, so slightly underdone is perfect
- Press Gently: When adding chocolate candies, press just enough to secure without cracking the cookie
- Chill for Success: If dough becomes too soft, refrigerate for 15 minutes before shaping
- Uniform Size: Use a cookie scoop for consistent results and even baking
Recipe Variations & Substitutions
Chocolate Peanut Butter Blossoms: Add 2 tablespoons cocoa powder to the dry ingredients and use white chocolate candies for contrast.
Crunchy Texture Version: Substitute crunchy peanut butter for added texture and nutty flavor.
Holiday Festive: Use colored chocolate candies or seasonal Hershey’s Kiss flavors like cookies and cream or caramel.
Gluten-Free Adaptation: Replace all-purpose flour with a gluten-free baking blend in equal amounts.
Behind the Recipe
The inspiration for perfecting this Classic Peanut Butter Blossom Cookies recipe came from countless holiday baking sessions and the desire to achieve that perfect balance of textures and flavors. After testing various ratios of sugars and fats, this version emerged as the ideal combination of chewy interior and slightly crisp exterior, crowned with that signature chocolate kiss that makes each bite a perfect harmony of peanut butter and chocolate.
Pairing Ideas
These delightful cookies pair beautifully with cold milk, hot chocolate, or fresh coffee. For a more sophisticated presentation, serve alongside vanilla ice cream or incorporate into a cookie platter with complementary flavors like oatmeal raisin or snickerdoodles. During holidays, they make excellent accompaniments to spiced cider or hot cocoa bars.
Leftover & Reuse Ideas
Crumble leftover cookies over vanilla ice cream for an instant sundae topping. They also make excellent additions to trail mix or can be chopped and folded into blondie batter for a peanut butter chocolate chip twist. For a creative dessert, layer crumbled cookies with pudding and whipped cream for a trifle-style parfait.
Nutritional Information
Each cookie contains approximately 145 calories, 7g fat, 18g carbohydrates, and 3g protein. These treats provide energy from natural peanut butter proteins and healthy fats, making them a more nutritious option than many traditional cookies. The combination of complex carbohydrates and protein provides sustained energy.
Serving Suggestions
Present these cookies on a decorative platter lined with parchment paper for casual gatherings. For gift-giving, arrange in clear cellophane bags tied with ribbon. During holidays, display on tiered serving stands alongside other homemade treats. The visual appeal of the chocolate center makes them perfect for special occasions and cookie exchanges.
Common Mistakes to Avoid
Overmixing the Dough: This develops too much gluten, resulting in tough cookies. Mix just until ingredients are combined.
Skipping the Sugar Roll: The granulated sugar coating is essential for both appearance and texture.
Adding Chocolate Too Late: Press the candies immediately after removing from oven while cookies are still hot.
Uneven Cookie Sizes: Inconsistent sizing leads to uneven baking. Use a cookie scoop for uniformity.
Storage & Reheating Tips
Store cooled cookies in an airtight container at room temperature for up to one week. Layer between sheets of waxed paper to prevent sticking. For longer storage, freeze for up to three months in freezer-safe containers. Thaw at room temperature for 30 minutes before serving. Avoid refrigerating as this can make cookies lose their ideal texture.
FAQs
Q: Why do my Classic Peanut Butter Blossom Cookies spread too much during baking?
A: Excessive spreading usually occurs when butter is too warm or dough is over-mixed. Ensure butter is softened but not melted, and chill dough if it becomes too soft.
Q: Can I make Classic Peanut Butter Blossom Cookies ahead of time?
A: Yes! Shape the dough balls and freeze on baking sheets, then transfer to freezer bags. Bake directly from frozen, adding 1-2 extra minutes to baking time.
Q: What’s the secret to perfect Classic Peanut Butter Blossom Cookies texture?
A: The key is not overbaking. Remove when edges are set but centers still look slightly soft. They’ll continue cooking on the hot pan.
Q: How do I prevent the chocolate from melting completely in my Classic Peanut Butter Blossom Cookies?
A: Press the chocolate candies gently and immediately after removing from oven. The residual heat will soften but not completely melt the chocolate.
Q: Can I substitute natural peanut butter in Classic Peanut Butter Blossom Cookies?
A: Yes, but stir well first and expect slightly different texture due to oil separation. You may need to adjust flour slightly if dough seems too wet.
Conclusion
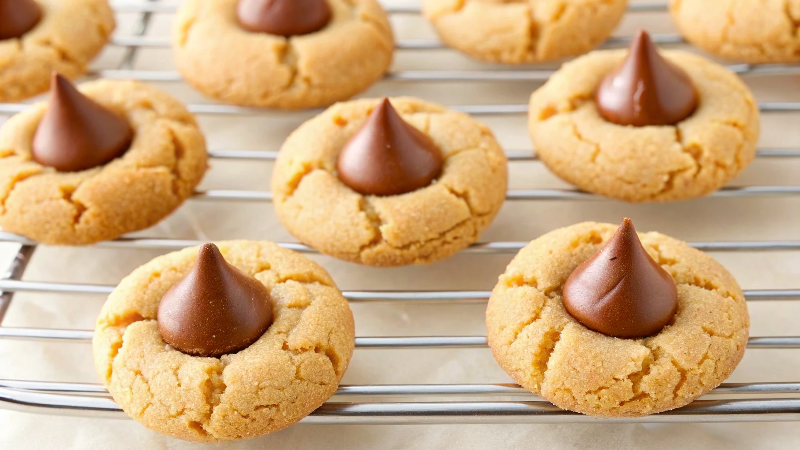
These Classic Peanut Butter Blossom Cookies represent the perfect fusion of nostalgic comfort and timeless appeal. With their tender peanut butter base, sparkling sugar exterior, and crowning chocolate kiss, they deliver both visual beauty and incredible flavor in every bite. The recipe’s straightforward technique makes it accessible for bakers of all skill levels, while the results consistently impress at any gathering.
Whether you’re continuing a family tradition or starting a new one, these cookies create lasting memories and bring people together around the simple joy of homemade treats. The combination of familiar flavors and foolproof technique ensures success every time you bake them.
Made this recipe? Drop your twist in the comments, rate the recipe, and tag us on Facebook, Instagram with #recipehoney.com we might feature your creation!

Classic Peanut Butter Blossom Cookies: How to Make Best Easy
Ingredients
Instructions
- Step 1: Preheat Oven: Heat oven to 375°F.
- Step 2: Mix Ingredients: In large bowl, beat 1/2 cup granulated sugar, the brown sugar, peanut butter, the butter and egg with electric mixer on medium speed, or mix with spoon, until well blended. Stir in flour, baking soda and baking powder until thoroughly blended and dough forms.
- Step 3: Shape Cookies: Shape dough into 1-inch balls; roll in additional granulated sugar. Place on ungreased cookie sheets, about 2 inches apart.
- Step 4: Bake Cookies: Bake one cookie sheet at a time for 8 to 10 minutes or until edges are light golden brown. Remove from oven and immediately press 1 milk chocolate candy in center of each cookie. Remove from cookie sheet to cooling rack. Repeat with additional cookie sheets.
- Step 5: Cool Cookies: Cool cookies until chocolate candies are set up, about 1 hour. Store in an air tight container in a single layer between sheets of waxed paper.